Website Orders To Northern Ireland Now Available!


Your Ultimate Shipping Container Gym Guide
A shipping container gym is simply a private, dedicated workout space built inside a standard shipping container, usually tucked away in a garden or on a driveway. It’s all about transforming a tough-as-nails steel box into your own fully functional, personalised fitness studio.
Why Your Next Gym Could Be in the Garden
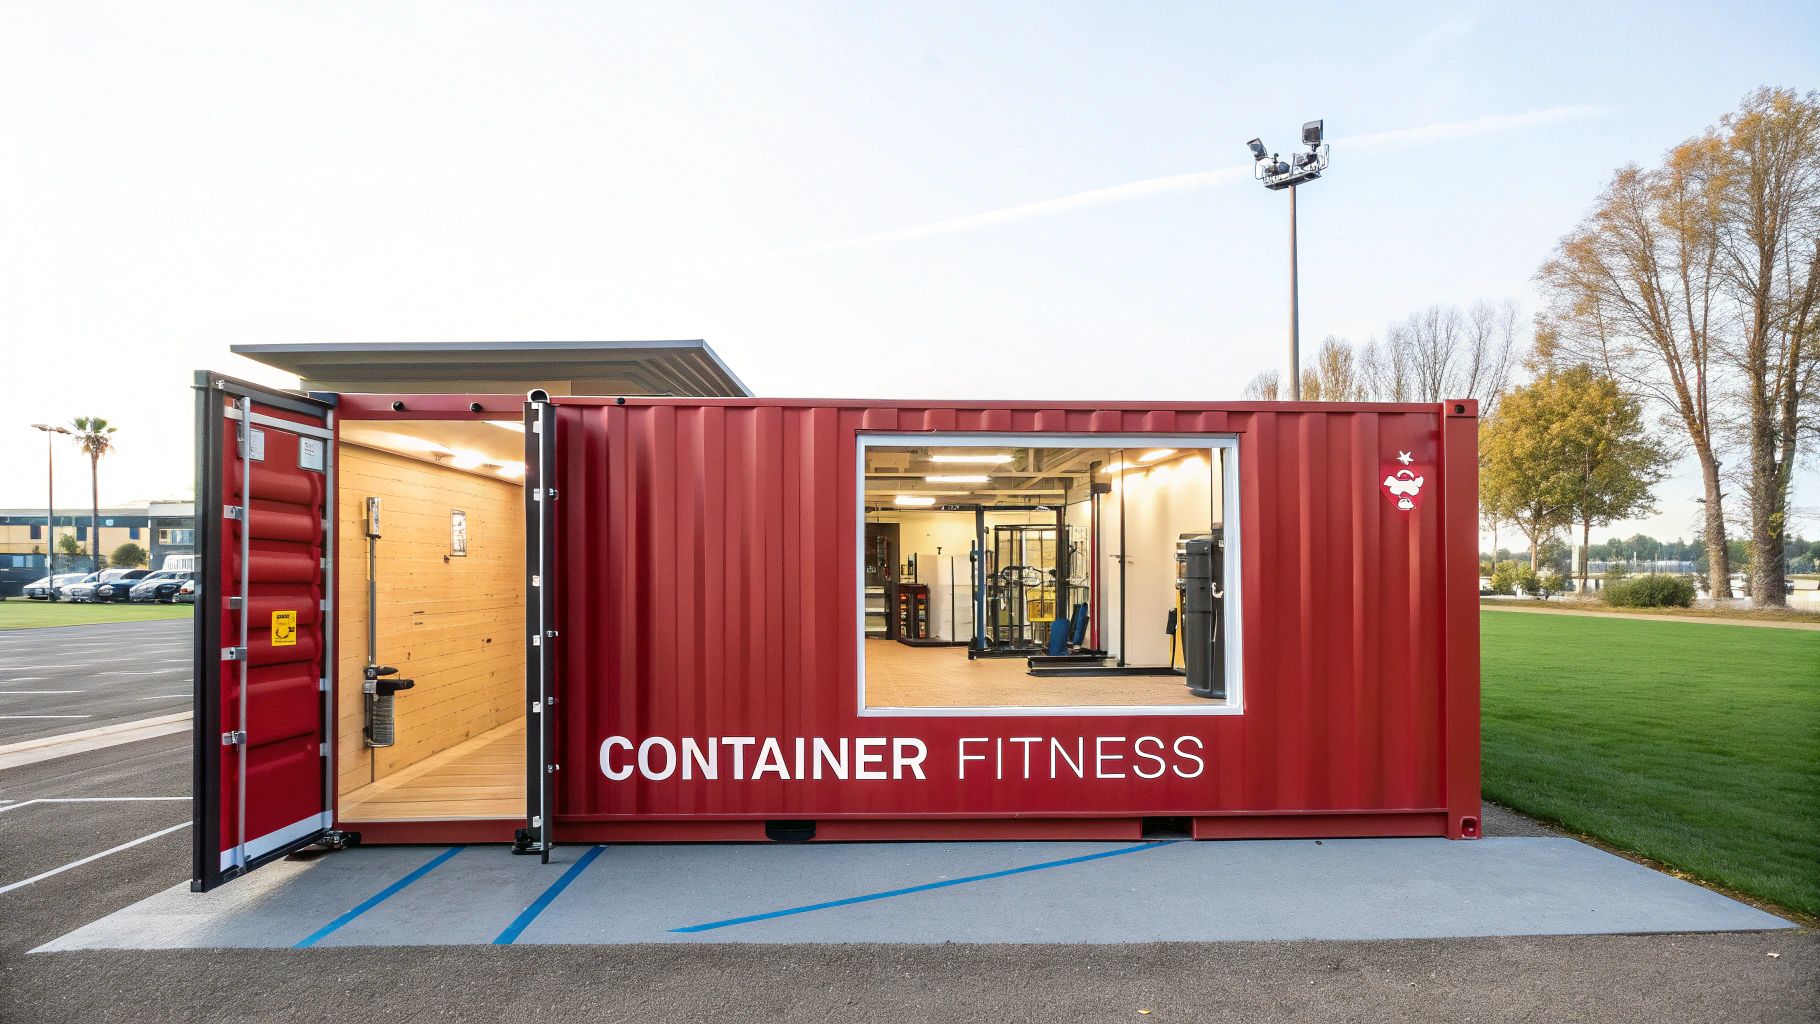
Imagine this: you swap the crowded weight room and the daily commute for a private, high-performance gym just a few steps from your back door. This isn't some futuristic dream; it's the reality for a growing number of fitness enthusiasts across the UK who are converting steel shipping containers into their own training sanctuaries.
The home gym concept isn't new, of course, but a shipping container gym offers a unique solution that a spare room just can't compete with. You get a self-contained, weatherproof, and incredibly secure space designed entirely around your fitness goals.
The Rise of the Garden Gym
The push towards home-based fitness really took off during the COVID-19 lockdowns. With commercial gyms shut, people had to find practical alternatives, and the robust, versatile nature of shipping containers made them an ideal choice. Their galvanised steel construction offers fantastic security and resilience against the unpredictable British weather, making them a lasting solution for year-round training.
This trend has stuck around long after the circumstances that sparked it, becoming a permanent fixture for those who are serious about their training. The real driver now? Unparalleled convenience and complete control.
A container gym puts you in charge. There are no opening times, no waiting for equipment, and no monthly membership fees. It’s your space, your rules, your schedule.
Core Benefits of a Container Gym
The appeal goes way beyond just convenience. A well-planned container gym brings several distinct advantages to the table for anyone looking to build a serious training environment at home:
- Total Customisation: Every inch of the space can be designed for your specific needs, from the layout and flooring to the exact equipment you want to use.
- Weatherproof Durability: A steel container is built to withstand the harshest elements, protecting your valuable equipment from damp and rust in a way a wooden shed never could.
- Ultimate Privacy: You can train without any distractions or feeling self-conscious, allowing you to get in the zone and focus completely on your workout.
- Long-Term Investment: While there's an initial setup cost, it completely eliminates recurring gym fees, offering significant financial savings over time.
Before you get started, making sure you have a stable foundation is absolutely crucial. You can learn more about this vital first step in our guide on how to level a shipping container. A proper base guarantees the longevity and safety of your investment.
Designing a Smart and Functional Layout
A great gym isn't just about the equipment; it's about the space itself. Before you even think about buying a single dumbbell, you need a solid plan. This is where you map out your fitness goals and turn them into a physical blueprint for a container gym that actually works for you, not against you.
The first big decision? Container size. It dictates everything that comes next. A compact 10ft unit might be perfect for a dedicated strength training corner, but a sprawling 40ft container gives you enough room to create distinct zones—maybe one for heavy lifting and another for cardio or functional fitness.
Choosing Your Shipping Container Size
Deciding on the right container size is a crucial first step. It needs to fit your available space, your budget, and most importantly, your workout style. This table breaks down the standard options to help you visualise what's possible.
| Container Size (Length) | Typical Internal Dimensions (W x H) | Best Suited For | Example Equipment Layout |
|---|---|---|---|
| 10ft | 2.3m x 2.4m | Solo training, minimalist setups, specific workout zones. | Power rack, bench, barbell with weights, a few kettlebells. |
| 20ft | 2.3m x 2.4m | All-round home gyms, personal training studios for 1-2 people. | Power rack, bench, deadlift platform, rower or assault bike, dumbbell rack. |
| 40ft | 2.3m x 2.4m | Multi-person use, commercial setups, distinct training zones. | Separate areas for strength (racks/platforms), cardio (treadmills/bikes), and functional fitness. |
Think about your long-term goals. While a 10ft container is great to start with, a 20ft offers more breathing room and flexibility as your equipment collection grows. The 40ft is the ultimate choice for those wanting to run a small personal training business or share the space with others.
Mapping Out Your Training Space
Once you’ve settled on a size, it’s time to get tactical. Think of it like a game of Tetris; every piece of equipment needs its own spot to create a gym that's both efficient and safe. Get the measuring tape out and start sketching. Whether it's on paper or with simple software, plot out where your squat rack, bench, and rower will live.
And don't forget the most important part: you. You need space to actually move. Leave plenty of room for dynamic exercises like deadlifts, kettlebell swings, and walking lunges. A classic mistake is cramming too much kit in, which not only feels claustrophobic but is a serious injury risk. Walk through a full workout in your mind to make sure the flow feels right.
Your layout should prioritise safety and functionality above all else. A well-designed space allows for unrestricted movement during dynamic exercises and provides clear, safe pathways between equipment stations.
If you’re working with a larger container, partitioning the area can create a much more organised feel. For some practical ideas on how to do this, check out our guide on smart ways to partition your shipping container space.
Building From the Ground Up
With your layout sorted, the focus shifts to the essentials that turn a steel box into a comfortable gym.
First up, and this is especially true for the British climate, insulation is non-negotiable. It’s the key to regulating the temperature inside, stopping your gym from becoming an icebox in winter and a sauna in summer. Good insulation also does a brilliant job of controlling condensation, which is crucial for protecting your expensive kit from damp and rust.
This visual guide shows the three key stages of converting your container into a functional gym, from initial planning to final setup.
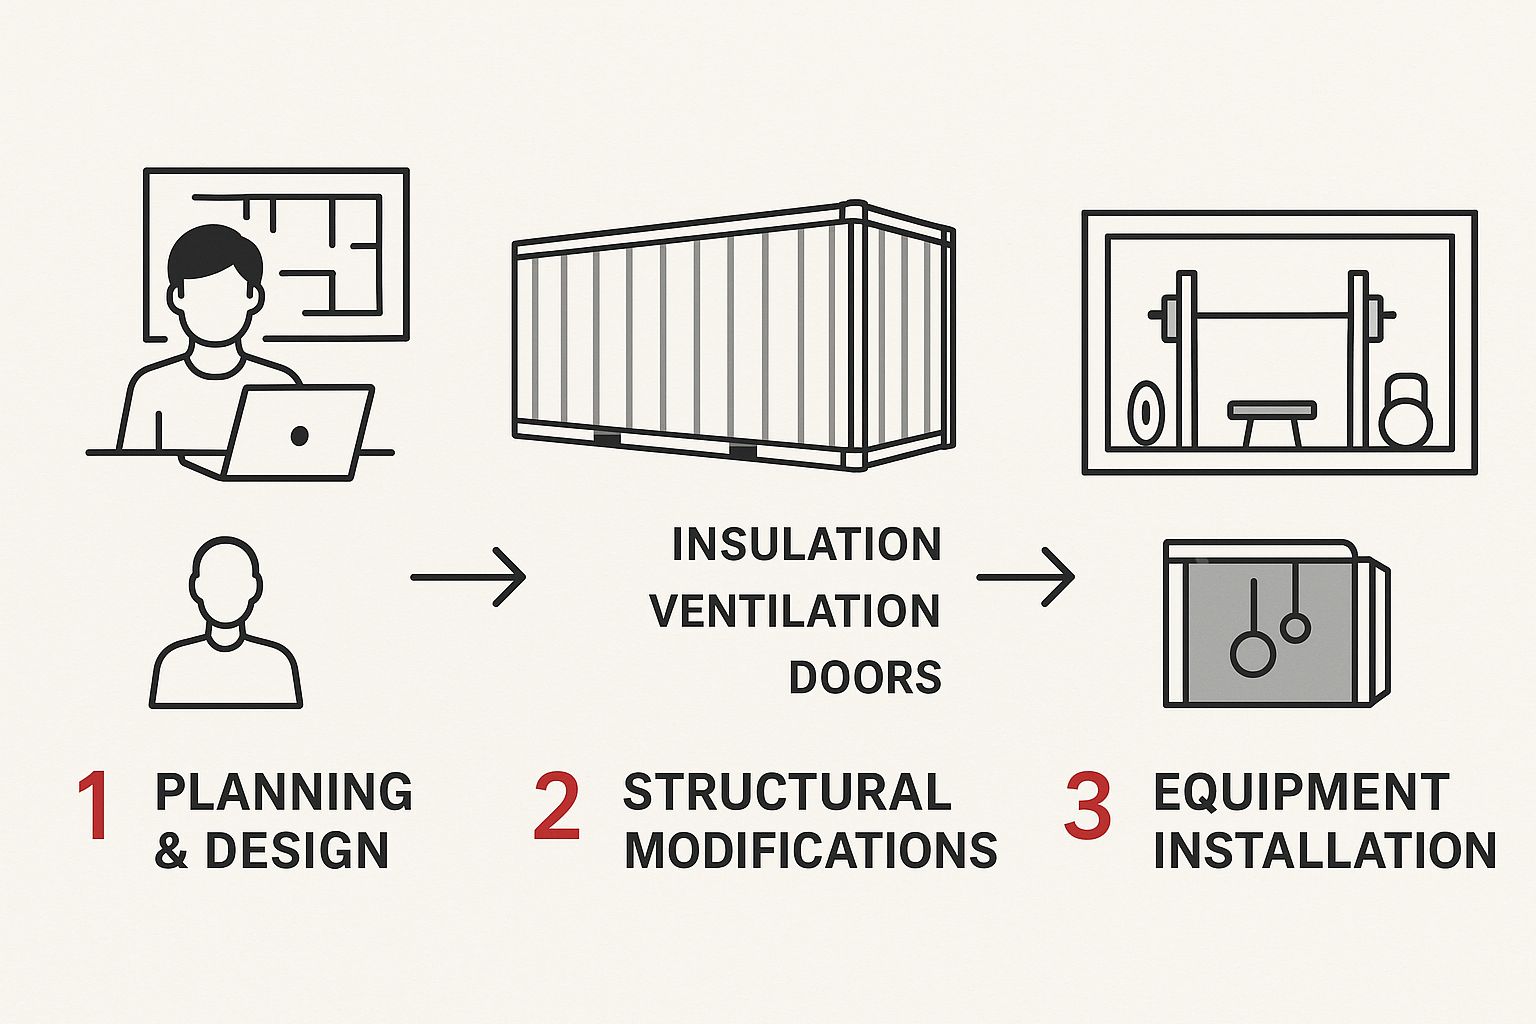 As the infographic shows, installing your equipment is the final step. This really hammers home how important it is to get the design and structural bits right from the start.
Next, you need to think about ventilation. Proper airflow is essential for managing moisture and keeping the air fresh during a tough session. This could be something as simple as a few wall vents or a more heavy-duty extractor fan.
Finally, the floor. You need something that can take a beating. Heavy-duty rubber matting is the industry standard for a reason: it absorbs the impact from dropped weights, protects the container's original flooring, and gives you a stable, non-slip surface to train on.
Essential Customisations for the UK Climate

Turning a bare steel box into a comfortable, year-round training space is where the real work begins. Given the UK's famously damp and unpredictable weather, a few key customisations aren't just nice-to-haves; they are absolutely essential for protecting your investment and creating a gym you'll actually want to use.
Skip these steps, and you're asking for trouble. Think condensation ruining your expensive equipment or a space that’s unusable for half the year. Getting these foundational elements right from the start means your gym will be a welcoming environment, no matter what the British weather throws at it.
Mastering Insulation and Ventilation
Your first line of defence is a solid one-two punch of insulation and ventilation. A metal container naturally experiences dramatic temperature swings and is a magnet for condensation—that dreaded moisture that forms on cold interior walls.
This "container rain" is the sworn enemy of any gym. It poses a serious rust threat to your barbells, racks, and plates. Proper insulation is the key to regulating the internal temperature, which drastically cuts down the chances of condensation forming in the first place. For a deep dive into the specifics, our guide on effective shipping container insulation methods offers detailed advice.
Once it's insulated, you've got to manage the moist air you create during a workout. That’s where ventilation comes in.
- Passive Vents: Installing simple vents like Quickfit’s container vents allows for constant airflow, helping to push damp air out.
- Extractor Fans: For a more active approach, a mains-powered extractor fan can quickly clear the air, which is a lifesaver during intense cardio sessions.
This two-pronged attack—insulating to control temperature and ventilating to remove moisture—is the cornerstone of a successful, long-lasting container gym here in the UK.
Sorting Electrics and Flooring
With climate control sorted, the next job is making the space practical and safe. A professional electrical installation is non-negotiable for lighting and powering any equipment like speakers or treadmills.
Durable LED strip lighting is a great shout. It provides bright, even light across the entire length of the container without eating into your valuable headspace. Placing sockets strategically around your planned equipment layout will also stop you from tripping over trailing extension leads.
A common mistake is underestimating flooring needs. Standard flooring won't cut it; you need something that protects both your equipment and the container's original plywood floor from the impact of heavy deadlifts and dropped dumbbells.
This brings us to the most critical surface in your gym: the floor. Heavy-duty rubber matting is the industry standard for a very good reason. Look for thick, non-slip rubber tiles or rolls, typically between 15mm and 30mm thick. This provides excellent shock absorption, dampens noise, and gives you a stable footing for heavy lifts.
Finally, think about security. While containers are inherently tough, upgrading the locking system is a sensible precaution. A high-quality padlock paired with a steel lockbox—which shrouds the padlock from bolt cutters—offers a significant deterrent and a whole lot of peace of mind.
Equipping Your Gym for Maximum Performance
This is where your vision truly comes to life. With the container's structure sorted, the focus shifts to filling it with equipment that actually powers your workouts. In the compact environment of a shipping container gym, every piece of kit has to earn its place.
The key is to think vertically and multi-functionally. Forget sprawling, space-hungry machines. You need to prioritise gear that offers maximum versatility for every square inch. This is how you build a powerful, uncluttered training space that feels way bigger than it is.
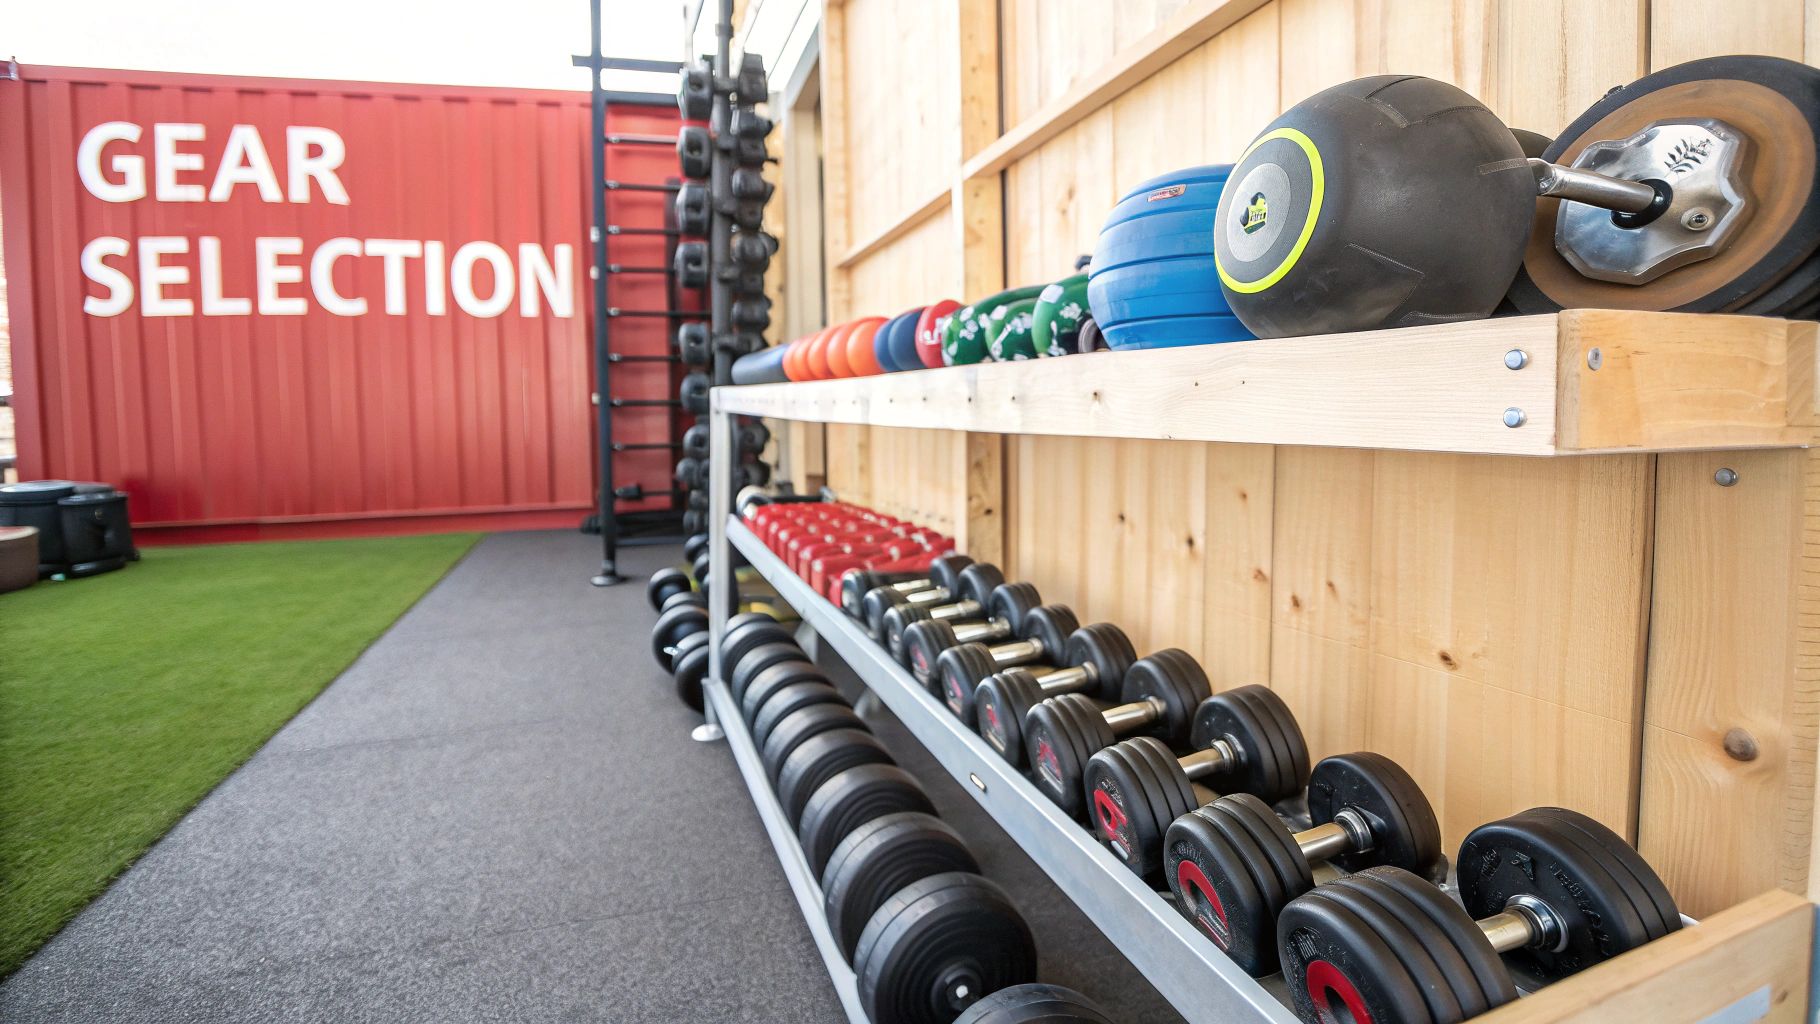
Maximising Space with Smart Equipment Choices
Choosing the right equipment is a game of strategic optimisation. A few clever selections can give you all the functionality of a commercial gym without any of the clutter.
-
Folding Squat Racks: A wall-mounted folding rack is arguably the single best investment you can make for a container gym. It gives you a rock-solid station for squats, bench presses, and pull-ups, then folds away nearly flat against the wall. That instantly frees up your floor space for deadlifts or kettlebell flows.
-
All-in-One Functional Trainers: These machines are the Swiss Army knife of gym equipment, combining a dual cable system, Smith machine, and squat rack into a single footprint. While it's a bigger investment upfront, one unit can replace three or four separate pieces of bulky gear, making it a powerful centrepiece for your setup.
-
Adjustable Dumbbells and Kettlebells: A single pair of adjustable dumbbells can replace an entire rack of 15-20 individual dumbbells. Honestly, this is a non-negotiable for saving space and keeping your gym organised. Adjustable kettlebells work on the same principle, offering multiple weight options in one compact unit.
To get the most out of your workouts, selecting the right gear is crucial. You can explore a great guide on home gym equipment essentials for more detailed insights. It's a solid resource for building a foundational kit that covers all your bases.
Sample Kit Lists for Different Training Goals
Your equipment list should be a direct reflection of how you train. A powerlifter's needs are worlds apart from a CrossFit enthusiast's. Here are a few sample load-outs to get the ideas flowing.
The Powerlifter's Essentials:
- A robust power rack (either folding or fixed)
- A high-quality, adjustable bench
- An Olympic barbell and a substantial set of bumper plates
- Heavy-duty rubber matting to create a deadlift platform area
The CrossFit Enthusiast's Arsenal:
- A versatile rig with pull-up bars and squat stations
- Barbell and bumper plates
- A solid set of kettlebells and dumbbells
- A Concept2 rower or an assault bike
- Plyometric box and gymnastic rings
The General Fitness Setup:
- Adjustable dumbbells and a bench
- Resistance bands and a suspension trainer (like a TRX)
- A stationary bike or cross-trainer for cardio
- Yoga mat and foam roller for recovery
Remember, you don't need everything at once. Start with the "big rocks"—your rack, barbell, and weights—and then build out your collection over time as you figure out what you truly need and use.
Sourcing Your Equipment in the UK
Building your dream gym doesn’t have to break the bank. A smart mix of new and second-hand equipment can deliver fantastic value for money.
For new kit, UK-based suppliers offer excellent quality and support. But don't sleep on the second-hand market—it's an absolute goldmine for savvy buyers. Check online marketplaces and local selling groups for high-quality, pre-loved gear at a fraction of the retail price. People often sell barely used equipment when their fitness goals change, which is a perfect opportunity for you to acquire premium kit for much less.
Getting to Grips with Your Container Gym Budget
Let's talk money. Building a shipping container gym is a serious project, and the last thing you want are nasty financial surprises derailing your vision. A clear, honest budget isn't just a spreadsheet; it's the foundation of a successful build, keeping you on track and stress-free.
So, what's the damage? The final figure can swing wildly depending on how ambitious you're feeling and how much you're willing to do yourself. You could pull off a basic, self-managed setup for around £4,000. Or, if you're picturing a high-end, professionally finished space with all the bells and whistles, you could be looking at upwards of £15,000.
Either way, having a solid financial plan is non-negotiable. This essential guide to budgeting for small business success is a fantastic resource. Yes, it’s aimed at businesses, but the core principles of forecasting costs and tracking every penny are exactly what a big project like this needs.
Breaking Down the Core Costs
So, where does all that money actually go? Your container gym budget really boils down to three main areas.
- The Container Itself: A decent used 20ft container is your starting point. Expect to pay somewhere between £1,500 and £2,500, plus a bit extra for delivery. Prices can vary a fair bit depending on its condition and where you are, so it's definitely worth shopping around.
- Customisation and Finishing: This is all the stuff that makes it a usable space – insulation, ventilation, flooring, and getting the electrics sorted. If you're handy on the tools, you might get this done for £500 - £1,500. Getting the pros in will naturally cost more.
- Gym Equipment: Here's where your budget can really flex. A simple setup with a rack, a bench, and a good set of weights could start from around £2,000. If you're aiming for a fully kitted-out strength and conditioning paradise, you could easily spend over £10,000.
Calculating Your Return on Investment
While that initial number might seem steep, it’s important to see this as a long-term investment, not just a one-off cost. The real value shines through when you stack it up against the relentless drain of a commercial gym membership.
The UK's health and fitness sector is a beast, pulling in over £5.7 billion in revenue from more than 11.5 million active gym-goers. That's a whole lot of people committed to their health, but it's also a colossal amount of money flowing out of pockets in recurring fees every single month.
Think about it this way: by investing in your own private gym, you kill those monthly payments for good. An average gym membership at £40 a month adds up to £480 a year. Over ten years, that's nearly £5,000 – money that could have paid for a huge chunk of your very own permanent training facility.
A shipping container gym pays for itself over time, and not just in pounds and pence. It pays you back in convenience, in privacy, and in the freedom to train whenever you want, how you want. It’s the ultimate personalised, on-demand fitness solution.
Common Questions About Container Gyms
Thinking about building a shipping container gym? You’re bound to have questions. It’s a fantastic project, but diving into the details of local council rules, ventilation, and budgeting is smart before you commit. We get these queries all the time, so let’s clear up a few of the most common ones.
Getting these final details sorted out is the difference between a smooth build and a project full of headaches. It's all about being prepared.
Do I Need Planning Permission?
This is the big one, and the answer is usually good news. For most setups in the UK, a shipping container is seen as a temporary or ancillary structure, much like a garden shed. That means you likely won't need planning permission, especially if it’s tucked away in a back garden and isn’t bolted to the ground.
However, don't assume that's always the case. Things get trickier if you live in a Conservation Area, an Area of Outstanding Natural Beauty, or if the container is unusually large or visible from the road.
The best advice I can give? Avoid any potential drama and have a quick, informal chat with your local planning authority before you buy anything. A five-minute phone call can give you a definitive answer and some much-needed peace of mind.
How Can I Stop Condensation and Damp?
Moisture management is the single most critical part of keeping a shipping container gym usable in the UK climate. Get this wrong, and you’ll be dealing with damp, mould, and rusty equipment. The solution is a two-pronged attack: insulation and ventilation.
Insulating the walls and ceiling is non-negotiable. It helps control the internal temperature, which is the root cause of condensation forming on the cold steel walls. But insulation alone isn't enough; you have to pair it with good ventilation to let all that moist air from your workout actually escape.
- Insulation: Spray foam is excellent, but rigid insulation boards also do a fantastic job of creating a thermal barrier.
- Ventilation: At a minimum, install passive air vents. For a heavily used gym, an active extractor fan is even better to guarantee constant airflow.
- Dehumidifier: During those cold, damp winter months, a dehumidifier is your best friend. It’s incredibly effective at pulling excess moisture right out of the air.
One extra tip: putting a waterproof membrane under your rubber gym flooring adds another layer of defence against damp rising from the container base.
What Is a Realistic Total Budget?
So, what’s this actually going to cost? For a solid, well-equipped DIY setup, a realistic budget usually lands somewhere between £4,000 and £8,000. That covers all the big-ticket items.
Here’s a rough breakdown. A good-quality used 20ft container will set you back £1,500-£2,500, plus delivery. Basic DIY fit-out for insulation and flooring might be another £500-£1,000. That leaves you with around £2,000-£4,000 for a solid set of core equipment – think a rack, bench, barbell, and plates.
Of course, you can slash these costs by hunting for second-hand gear and doing all the work yourself. On the flip side, if you opt for professional customisations and high-end machines, that total investment will climb.
Ready to get started on your build? For all the essential parts you'll need, from vents to security lockboxes, Quickfit Container Accessories has you covered. Check out our full range of products at https://www.quickfitcontaineraccessories.co.uk.