Website Orders To Northern Ireland & Republic Of Ireland Now Available!


Insulating a Shipping Container Your Definitive UK Guide
Getting the insulation right is hands-down the most important step in any shipping container conversion. It's the one thing that stands between a comfortable, usable space and a metal box that swings between roasting hot and freezing cold. Insulation creates a vital thermal shield, stopping heat from transferring and, crucially, managing moisture. For creating a functional office, workshop, or home in the UK's notoriously fickle climate, it’s not just a good idea—it's essential.
Why Proper Insulation Is Crucial For UK Container Builds
Shipping containers are, at their core, just big steel boxes. And steel is a fantastic conductor of heat. This is great for shipping goods across the ocean, but not so great for living or working in.
Without proper insulation, the inside of your container will feel like an oven on a warm summer day and a freezer during a cold winter night. This massive temperature swing is the fundamental problem every container conversion has to solve.
The UK’s climate just makes things worse. Our damp, constantly changing weather amplifies these issues, leading to serious problems if insulation is skipped or done poorly. Honestly, getting the insulation right is the single best investment you can make for the long-term comfort and health of your container build.
The Science Of Steel And Condensation
In a container conversion, your number one enemy is condensation. It’s a simple process: warm, moist air inside the container hits the cold steel walls, cools down fast, and releases its moisture as water droplets. This "dew point" is the start of some potentially disastrous problems.
Without an effective thermal break between the interior and the steel, you're basically creating the perfect storm for:
- Rust and Corrosion: Constant moisture will eat away at your container's steel structure from the inside out.
- Mould and Mildew: Damp, dark spaces behind your interior walls are a breeding ground for harmful mould, which brings health risks and a nasty, musty smell.
- Damaged Belongings: Anything you store inside, from furniture and documents to electronics, can be completely ruined by persistent dampness.
A pretty stark, real-world example of this was the temporary container homes built by Ealing Council. They were eventually decommissioned after residents complained about freezing winters, boiling summers, and serious mould issues—all stemming from poor insulation and condensation. The Royal Institution of Chartered Surveyors even wrote a report on the project, highlighting just how critical this step is.
Understanding Thermal Bridging
Another key concept you need to get your head around is thermal bridging. This happens when a conductive material, like the steel ribs inside a container, creates a direct path for heat to bypass your insulation.
Imagine building a timber frame directly against the steel walls. Every single wooden stud acts as a "bridge" for the cold to travel straight through your insulation, creating cold spots on your interior walls. This massively reduces the effectiveness of your entire setup.
A well-thought-out insulation strategy does more than just regulate temperature; it protects the structural integrity of your container and the health of its occupants by actively preventing condensation.
At the end of the day, insulating a shipping container isn’t just about feeling comfortable. It's about protecting your investment. It’s the foundational step that stops your project from turning into a rusty, damp, and unusable mess. Before you even think about framing, you need to understand how to reduce condensation in shipping containers to get ahead of the problem.
Choosing the Right Insulation for Your Container
Picking the right insulation for your shipping container can feel like a minefield of technical terms and conflicting advice. Honestly, the best choice really boils down to three things: your budget, what you're using the container for, and how much of the work you plan to do yourself.
Whether you're building a garden office that needs to be cosy year-round or a simple workshop, getting your head around the main options is the first crucial step. In the UK, you’ll mostly be looking at spray foam, rigid foam boards, or traditional blanket insulation. Each has its place, and getting this decision right from the start will save you a world of headaches later on.
High-Performance Spray Foam
Closed-cell spray foam is often seen as the gold standard for container projects, and for good reason. It’s applied as a liquid that expands to fill every single nook and cranny, creating a seamless air and vapour barrier. This airtight seal is brilliant at stopping condensation dead in its tracks and eliminating thermal bridging through the steel walls.
Of course, this top-tier performance doesn't come cheap. In the UK, you can expect to pay between £20 and £30 per square metre for a professional installation. While you can get DIY kits, they demand serious safety precautions, including full respiratory gear. For most people, hiring a professional is the only sensible way to go.
Versatile Rigid Foam Boards
Rigid foam boards, like PIR (Polyisocyanurate) or XPS (Extruded Polystyrene), are a fantastic middle-ground option. They give you excellent thermal resistance without being overly thick, which is a massive plus when you're trying to save every inch of interior space in a narrow container.
These boards are a massive hit with the DIY crowd. They’re easy enough to cut to size and can be glued directly onto the container's corrugated walls. The real trick is to get a super snug fit and then meticulously tape up all the seams with high-quality foil tape. This step is vital for creating an effective vapour barrier and stopping damp from getting in.
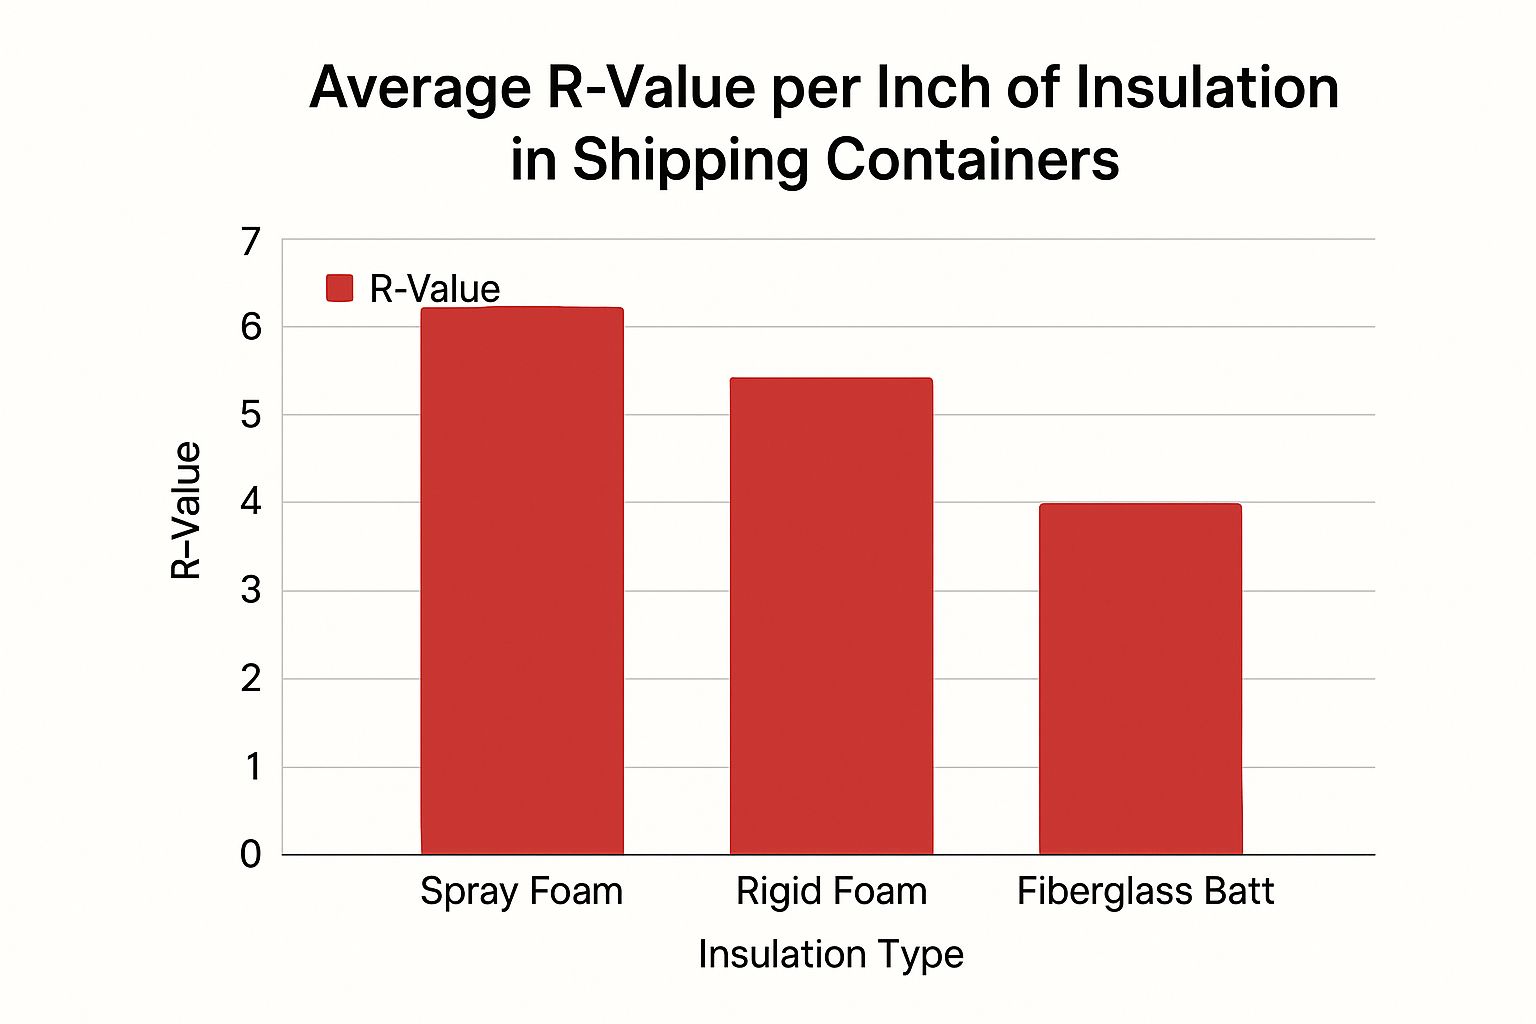
As you can see, spray foam packs the biggest punch in terms of insulating value for its thickness, making it the most space-efficient choice by far.
Comparing Insulation Materials for Shipping Containers
With so many options, a side-by-side look can help clear things up. Here’s a quick breakdown of the common materials used in UK container conversions, focusing on the factors that really matter.
| Insulation Type | Typical UK Cost (£/m²) | Pros | Cons |
|---|---|---|---|
| Spray Foam | £20 - £30 (Pro install) | Highest R-value per inch, creates a perfect air & vapour seal, excellent for condensation control. | Most expensive option, really a job for professionals due to safety concerns. |
| Rigid Foam Boards | £10 - £20 | Great balance of performance and cost, DIY-friendly, preserves interior space. | Seams must be perfectly sealed to create a vapour barrier, can be time-consuming to fit. |
| Blanket Insulation | £5 - £10 | Most affordable material, readily available at most builders' merchants. | Requires a full internal timber frame, lowest R-value (needs to be thicker), framing eats into space. |
Ultimately, the right material depends on whether you're prioritising performance, budget, or ease of installation.
Budget-Friendly Blanket Insulation
If you're working to a tight budget, blanket insulation like mineral wool or fibreglass is definitely a workable option. It's the cheapest material you can get per square metre, but there's a catch: its lower R-value means you'll need a much thicker layer to get the same insulating effect as you would with foam.
Remember, the primary drawback of blanket insulation is the need for a full internal timber frame. This not only adds to the cost and complexity of the build but also reduces your final interior dimensions.
This frame creates the cavities needed to hold the insulation batts in place. Once that's done, you still have to cover it all with a separate vapour barrier sheet before you can even think about putting up an interior finish like plywood.
While it's effective when done right, it is by far the most labour-intensive method. And a great finish often involves more than just insulation; you might want to explore our guide on shipping container cladding for ideas on how to finish the exterior. To achieve year-round comfort in the UK, you'll generally need between 50mm and 100mm of insulation, depending heavily on which material you go with.
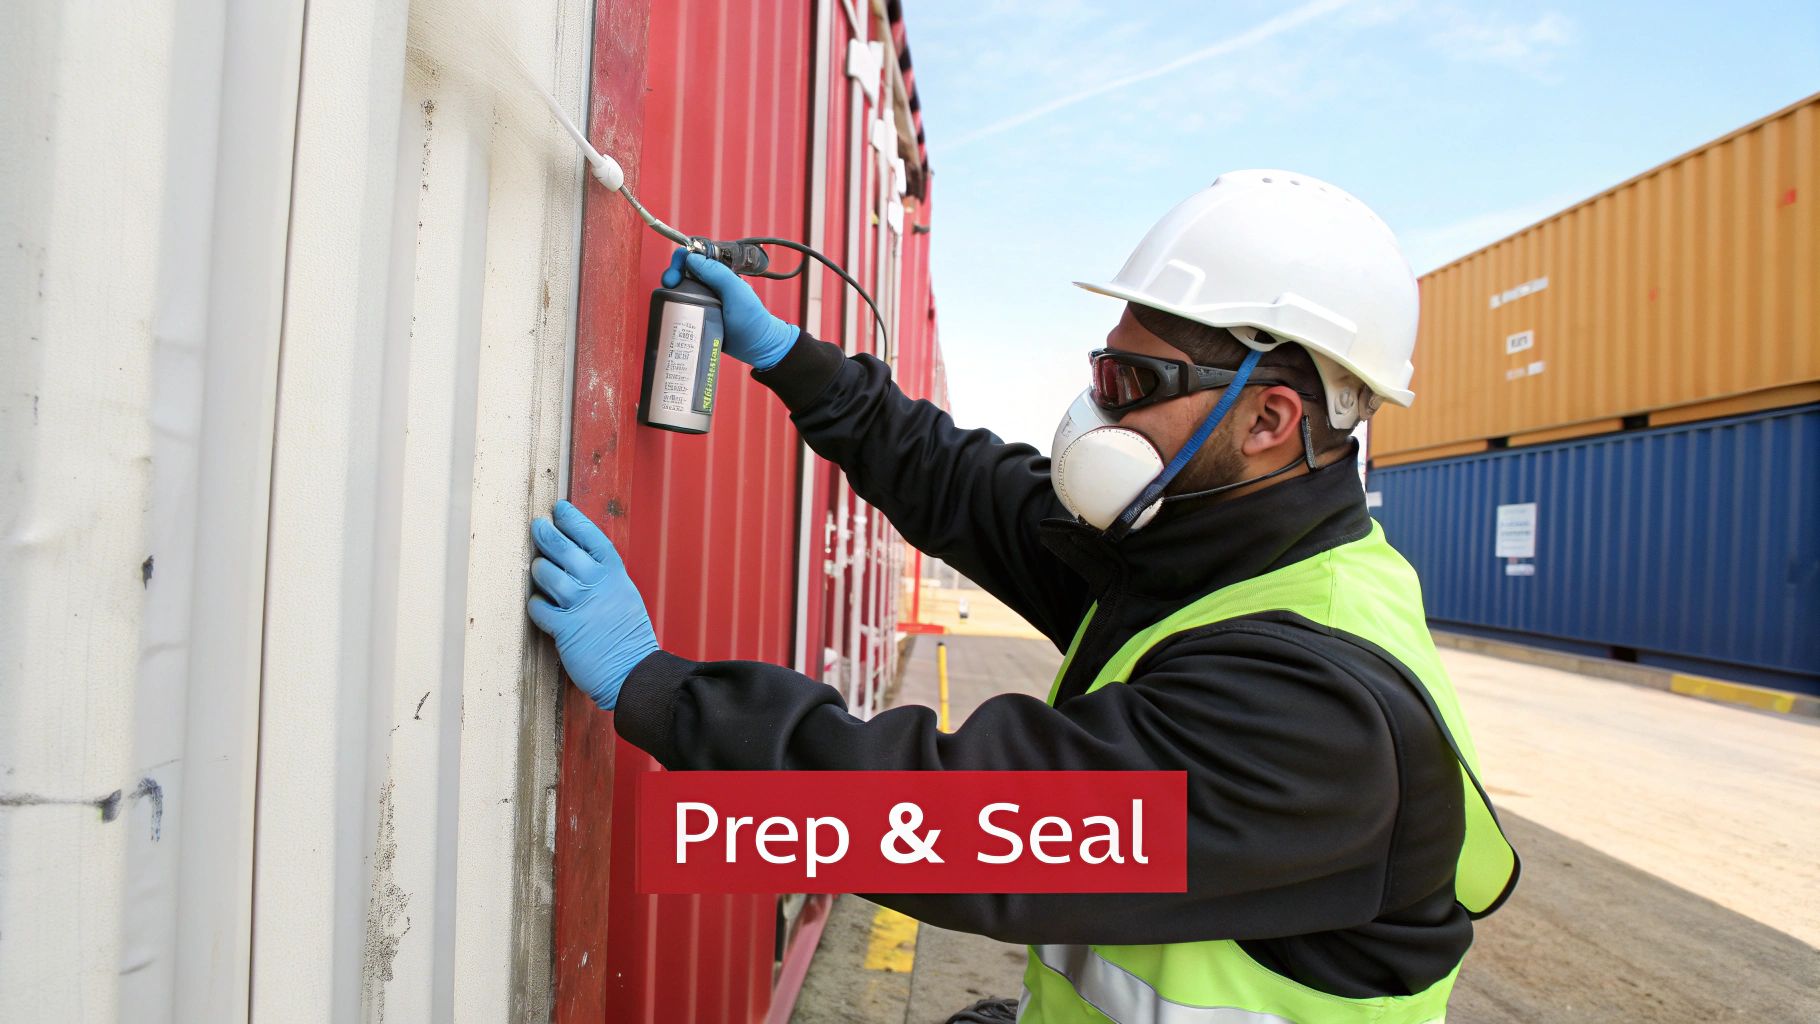
Preparing Your Container For A Perfect Finish
Before you fit any insulation, invest time in preparing your container properly. Insulating a container that’s grimy, rusty or leaking is like trying to lay flooring on quicksand—everything eventually goes wrong.
Begin with an intense interior clean. Shipping containers endure harsh conditions and can harbour chemical residues, oil stains and dirt. Use:
- A powerful degreaser to cut through grime
- A stiff brush to dislodge stubborn deposits
- A pressure washer to rinse away every trace of residue
Make sure the walls are spotless before moving on. Adhesives and tapes simply won’t bond if the steel isn’t pristine.
Tackling Rust And Sealing Gaps
Even small areas of corrosion can undermine your insulation. Inspect every nook—especially around floor edges and dents. When you spot surface rust:
- Fire up an angle grinder with a wire brush attachment
- Remove loose flakes and dust thoroughly
- Coat exposed metal immediately with a rust-inhibiting primer
Once the rust is gone, it’s time to seal and secure. Your goal should be a fully airtight, watertight shell:
- Smooth polyurethane sealant into every seam and joint
- Plug pinholes to stop moisture or drafts slipping through
- Double-check door seals and corners—their failures are legendary
Creating a completely sealed envelope is non-negotiable. This single step prevents water ingress and draughts, which would completely undermine your insulation efforts and create a perfect environment for damp and mould.
Framing Your Interior Space
Deciding on an internal frame shapes the rest of your build. A timber structure delivers a cavity for blanket insulation and a secure surface for your chosen cladding.
Keep these considerations front of mind:
- Timing: Glue rigid foam boards direct to steel first or build the frame before fitting mineral wool?
- Fixings: Weld anchor points or opt for a ‘floating’ frame to minimise thermal bridging?
- Placement: Ensure your container is perfectly level before you begin any framing. You can learn more by reading our complete guide on how to level a shipping container, as a stable base is crucial for everything that follows.
It might feel like extra effort, but this professional approach ensures your container ends up warm, dry and built to last.
Getting Stuck In: A Practical Guide to Installing Your Insulation
Right, you've prepped your container and picked out your materials. Now for the fun bit – bringing it all to life. This is where a bit of care and attention really pays off, turning that steel box into a space you can actually use comfortably.
Every type of insulation has its own way of being fitted, but the end goal is always the same: create a solid, unbroken thermal barrier that keeps the British weather out and the comfort in.

Let's walk through how to install the most common materials you'll find in UK container projects. I'll share a few practical tips to help you sidestep the common mistakes that catch people out the first time.
Fitting Rigid Foam Boards
Rigid foam boards like PIR or XPS are a massive favourite for DIY builds, and for good reason. They're straightforward to work with. The whole secret to getting this right is to achieve a really snug, airtight fit directly against the container's corrugated steel walls.
Here's what your process should look like:
- Measure Twice, Cut Once: Take careful measurements of each section of the wall you're working on. Use a sharp utility knife or a fine-toothed saw to get your cuts precise. You're aiming for a friction fit, where the board is tight enough to hold itself in place.
- Get the Adhesive On: Apply a good amount of specialist foam board adhesive to the back of the panel. Make sure you get it onto the high points of the corrugations – that's where it'll make contact with the steel and form a strong bond.
- Press and Hold: Firmly press the board into position. Hold it there for a minute or so to give the adhesive a chance to really grab on. The goal is to leave no air gaps between the board and the steel.
- Seal Every Single Seam: Once all your boards are up, this is the most important step of all. You need to tape over every single joint and edge with high-quality aluminium foil tape. This creates a continuous vapour barrier, and it's absolutely non-negotiable if you want to prevent condensation.
A classic mistake is rushing the taping or trying to save a few quid on cheap tape. Even a tiny gap can let warm, moist air from inside touch the cold steel wall. That creates a condensation point and basically undoes all your hard work. Be meticulous with it.
Working with Spray Foam Insulation
Spray foam is the gold standard for performance. It creates a seamless, single layer of insulation that gets into every nook and cranny. But, and it's a big but, applying it demands a lot of respect and serious preparation.
Honestly, for most projects, I'd strongly recommend hiring a professional. They have the proper training and the industrial-grade kit to apply it safely and evenly. If you are determined to use a DIY kit for a small job, you cannot cut corners on safety. You absolutely must have:
- A full-face respirator with the correct cartridges
- Disposable coveralls, gloves, and proper eye protection
- Plenty of ventilation while you're spraying and while it cures
The foam bonds directly to the clean steel, filling every void and completely wiping out thermal bridging. It's an incredibly effective way to insulate a container, but it's definitely not a casual weekend job.
Installing Blanket Insulation
Blanket insulation, like mineral wool, is the more traditional route. This method requires building a timber frame inside the container first. The trick here is to avoid squashing the insulation, because that absolutely kills its thermal performance.
You'll want to cut the insulation batts just a little bit wider than the space between your timber studs. This lets you gently push them into the cavity, where they'll stay put just from friction. If you have to cram it in, you're crushing all the air pockets that do the insulating, and the R-value will plummet.
Even with a perfectly fitted frame, condensation is still a potential headache. You can give yourself an extra line of defence by using something like a Container Guard moisture trap to help pull any excess humidity out of the air inside the sealed container.
Effective insulation really is a game of millimetres. The right thickness makes a world of difference. In fact, research shows that doubling your insulation from 2.5 cm to 5 cm can boost thermal performance by as much as 40%. Here in the UK, a thickness between 50 mm and 100 mm is generally what you need to keep a container comfortable all year round, which will slash your energy bills. If you want to dive into the data, you can learn more from the thermal design findings for shipping containers.
Adding Vapour Barriers and Interior Finishes
With your insulation snugly fitted, it feels like you're on the home straight. But don't rush to cover it up just yet. What you do next is absolutely critical for the long-term health of your container, especially with the UK’s notoriously damp climate. This stage is all about managing moisture and adding the finishes that turn a steel box into a proper, usable space.
Before a single piece of cladding goes up, you have to install a vapour barrier. You might also see it called a vapour control layer or VCL. Think of it as an impermeable sheet that stops the warm, moist air from inside your container from hitting the cold steel walls and causing chaos.
The Vapour Barrier: Your Defence Against Condensation
Condensation is the number one enemy of any container conversion in the UK. A properly installed vapour barrier is your best line of defence, and its placement is non-negotiable. It must be installed on the warm side of the insulation—that’s the interior side, just behind whatever you choose for your final wall finish.
Getting this wrong is a catastrophic mistake. If you put it on the cold side (between the insulation and the steel wall), you’ll trap moisture right where you don't want it. Your expensive insulation will become a soggy, useless mess, creating a perfect breeding ground for mould and rust. The aim here is to create a completely sealed, continuous envelope.
- Overlap all seams by at least 150mm.
- Use a high-quality vapour-proof tape to seal every single join, corner, and edge. Don't cheap out on the tape!
- Take extra care sealing around any openings for wires, sockets, or pipes.
I always tell people to think of the vapour barrier like a high-end raincoat for their insulation. One small tear or an unsealed gap is all it takes to let damp in and compromise the whole setup. Be meticulous here. Take your time. It’ll pay you back for years to come.
Choosing Your Interior Cladding
Once your vapour barrier is perfectly sealed, you can get to the exciting part: cladding the interior. This is what defines the look and feel of your space. That timber frame you built earlier now becomes the perfect anchor for your chosen material.
Here in the UK, a few popular choices come up time and time again:
-
Plywood: This is a solid, cost-effective, and practical choice. It gives a clean, utilitarian look and is strong enough to hang shelves or tools from directly. For a smoother, more refined finish, you can't go wrong with birch-faced ply.
-
Plasterboard (Drywall): If you want a finish that feels just like a conventional room in a house, plasterboard is your go-to. It’s relatively cheap and easy to install, though it does mean you'll be taping, jointing, and painting afterwards to get that seamless look.
-
Tongue-and-Groove Panelling: For a rustic, log-cabin vibe, tongue-and-groove boards are a fantastic option. They add a huge amount of character and can be installed vertically or horizontally. Often, all they need is a simple coat of varnish or paint to look finished.
Got Questions About Insulating Your Container?
Taking on a container conversion is exciting, but it almost always brings up the same set of questions. Getting these sorted from the start gives you the confidence to get on with the job and make smart decisions.
We've pulled together the most common questions we hear from people insulating their shipping containers and given you some straight, practical answers.
What’s the Best Insulation for a Shipping Container in the UK?
This is the big one, but there’s no single right answer. While closed-cell spray foam is the top performer—creating a perfect, seamless barrier against air and moisture—the ‘best’ option really comes down to your budget and how hands-on you want to be.
For a fantastic balance of high performance and DIY-friendliness, you can’t go wrong with rigid foam boards like PIR or XPS. They give you brilliant thermal value without needing a professional team to install them.
If you're on a tighter budget and don't mind losing a little interior space, a traditional timber frame filled with mineral wool is a solid, reliable choice. It's a classic for a reason.
Do I Really Need to Insulate the Floor and Ceiling?
Yes, absolutely. If you want a space that's comfortable and cheap to heat or cool, you have to insulate all six sides: the four walls, the floor, and the ceiling. This is non-negotiable for any serious conversion.
Think about it—the corrugated steel floor and roof are massive sources of heat loss in the winter and heat gain in the summer. Skipping them will completely undermine all the effort and money you put into insulating the walls.
It's like putting on a warm coat but leaving your hat and boots at home on a snowy day. To be truly protected, you need complete, all-around coverage.
How Do I Stop Condensation in My Insulated Container?
Condensation is the number one enemy of any container project. Beating it requires a disciplined, three-part strategy. Each part is just as vital as the next, and skipping one will cause you headaches down the line.
Here’s your action plan:
- Quality Insulation: First and foremost, effective insulation keeps the internal steel surfaces warm enough to stay above the dew point. This stops moisture from forming in the first place.
- A Continuous Vapour Barrier: This layer must be installed on the warm side of your insulation (the interior side). It’s crucial for blocking moisture-filled air from ever reaching the cold steel.
- Proper Ventilation: Finally, you need a way to get rid of damp air, especially in places like kitchens or bathrooms. Simple extractor fans or trickle vents can make a huge difference.
Stick to this three-pronged approach, and you’ll have the best defence against damp and mould when insulating your shipping container.
For all the essential parts and technical advice you need to customise your project, explore the extensive online catalogue from Quickfit Container Accessories. Visit us at https://www.quickfitcontaineraccessories.co.uk.