Website Orders To Northern Ireland & Republic Of Ireland and USA Now Available!


Shipping Container Shelving Brackets: The Ultimate Guide
Trying to use standard, free-standing shelves in a shipping container is a recipe for disaster. It's something we see all the time – people try to make regular warehouse racking work against the corrugated steel walls, only to end up with wobbly, inefficient, and frankly, unsafe setups.
The real solution lies in using shelving brackets designed specifically for shipping containers. These aren't just a "nice-to-have"; they're essential for creating a secure, space-maximising system that truly works with the container's unique structure.
Why Standard Shelving Just Doesn't Cut It
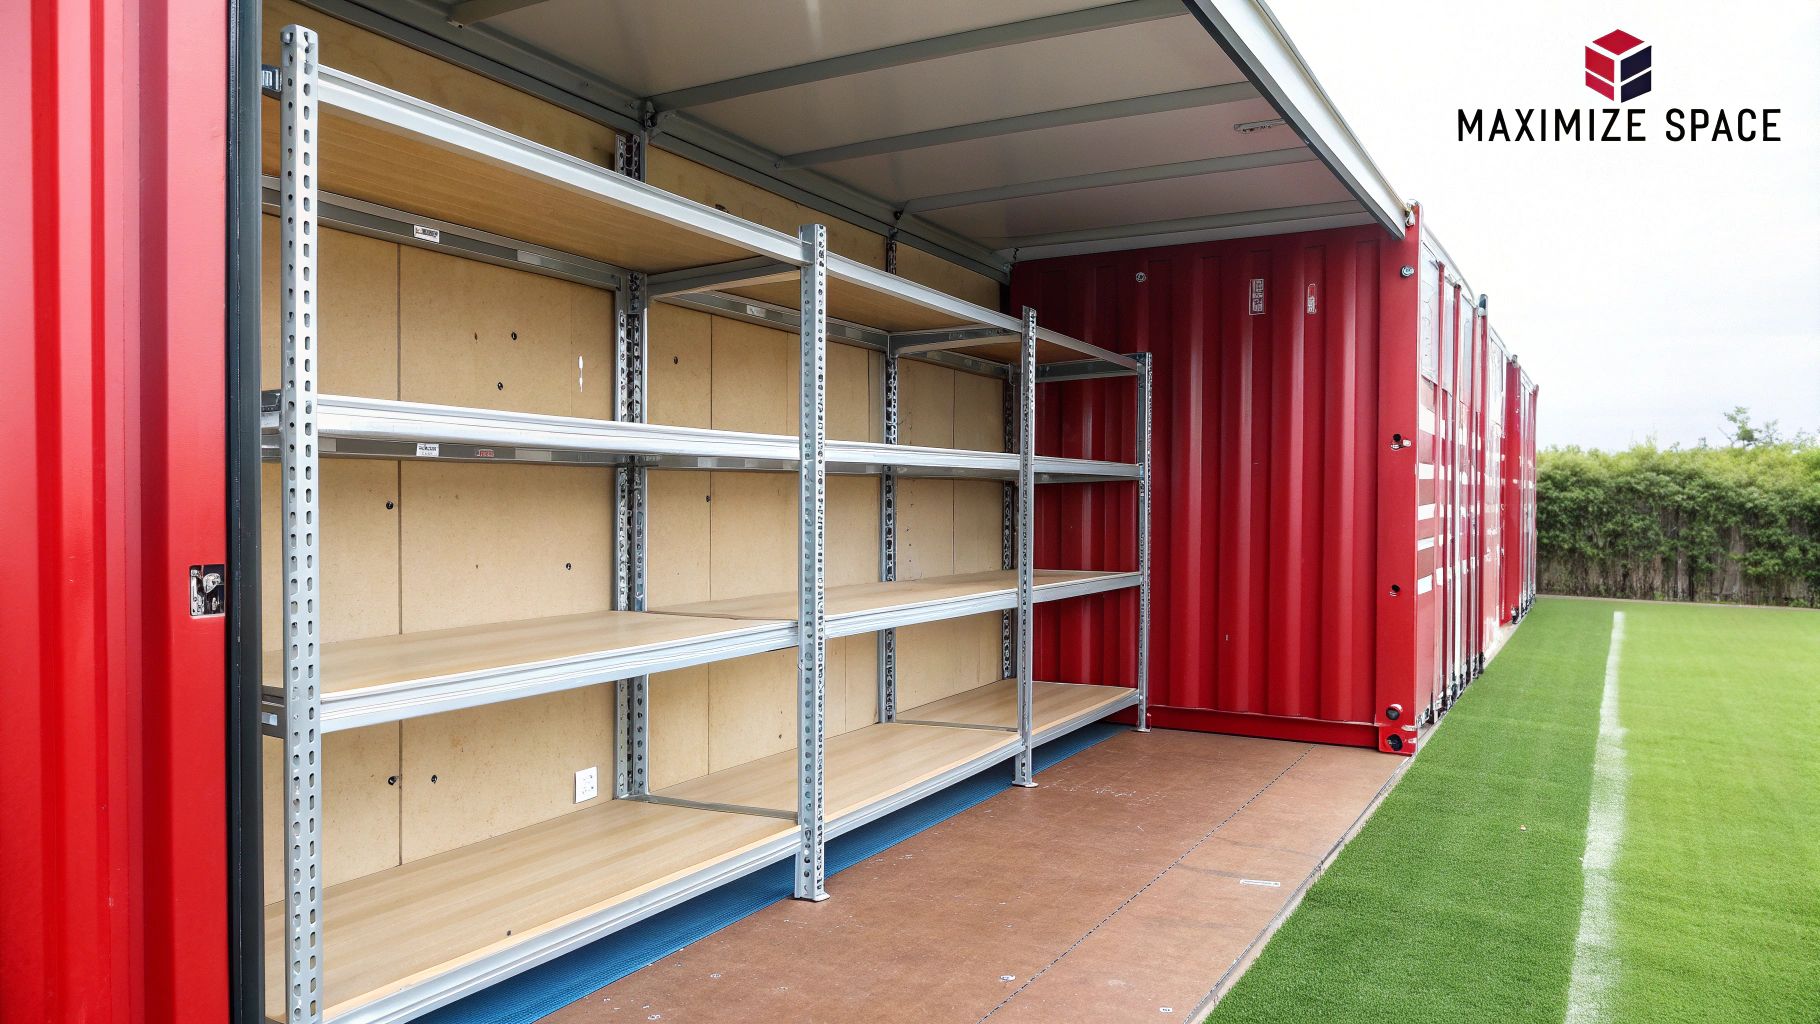
Whether you're turning a container into a workshop, a stockroom, or just a seriously organised storage unit, your success hinges on getting the shelving right. The core problem with off-the-shelf racking is those corrugated walls.
Because the surfaces aren't flat, free-standing units can't sit flush. This creates instability right from the start. A wobbly shelving unit isn't just a minor annoyance; it’s a major safety hazard, especially if you're storing anything heavy or valuable. This problem is only amplified by the fact that most containers sit on ground that isn't perfectly level to begin with.
The Purpose-Built Advantage
This is where shipping container shelving brackets completely change the game. They are engineered to work with the container's design, not fight against it. Most are 'no-drill' and 'no-weld' systems, cleverly designed to attach directly to the container's built-in D-rings or lashing points.
Hooking into the container's existing structure gives you a few massive advantages:
- You Use Every Inch of Space: These brackets let you run shelving along the full length and height of the walls, transforming that empty vertical space into practical, usable storage.
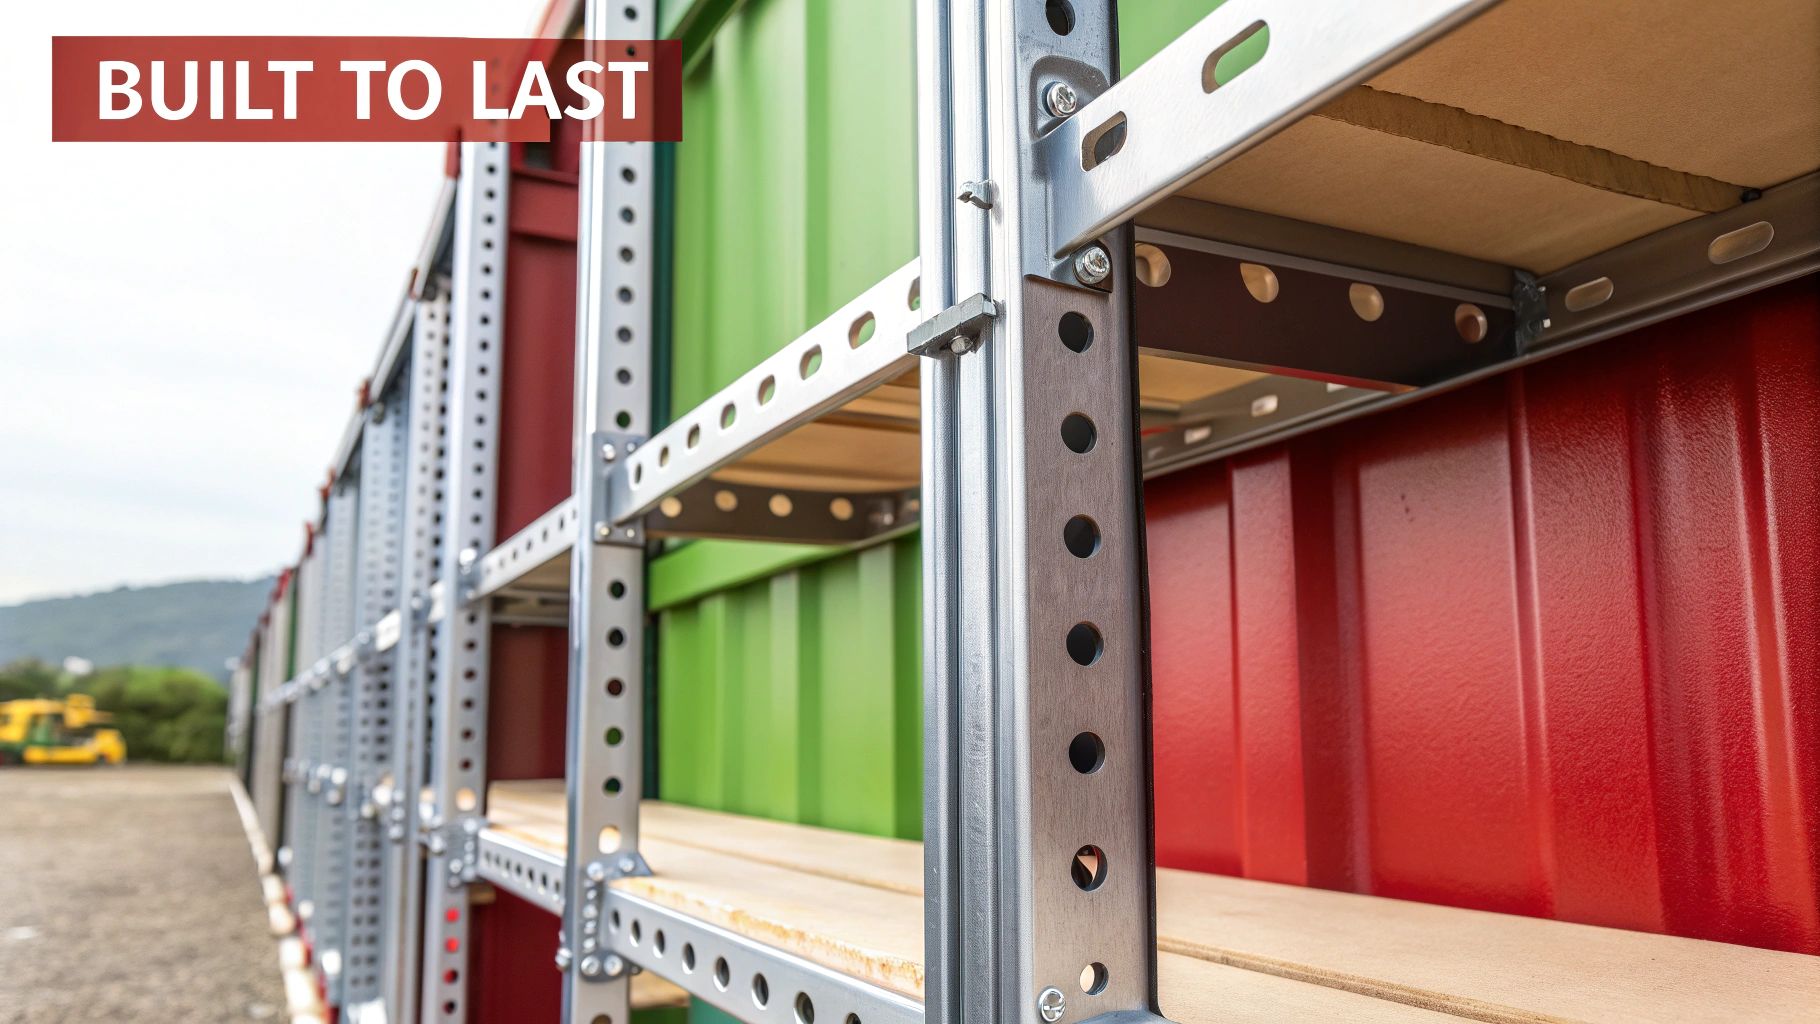
- It’s Rock-Solid Stable: Anchoring directly to the container's steel frame creates an incredibly sturdy system. There's no shifting, no tipping, no worries.
- You Keep the Container Intact: A no-drill approach means you don't puncture the container's walls. This is absolutely critical for preserving its water-tightness and structural integrity, especially in the damp UK climate.
The whole idea is to turn the container's unique features into an asset. Those corrugated walls go from being a problem to being part of a super-secure and efficient storage solution.
You only have to look at the sheer volume of containers moving through the UK to understand why efficient internal organisation is so critical. Major ports like Felixstowe and Southampton handle millions of containers each year, a testament to their importance in our supply chains. Making that space work, whether in transit or on-site, comes down to smart shelving.
Choosing the right brackets is the first, most important step in any container conversion. For more ideas on planning your layout, have a look at our guide on how to maximise space with smart shipping container shelving.
Choosing the Right Brackets for Your Project
Getting your shelving right starts with one crucial decision: picking the correct shipping container shelving brackets. This choice is genuinely the foundation of your entire container conversion. It doesn't just affect how your storage works—it determines how safe and long-lasting it will be.
Get this right, and you've got a system that’ll serve you well for years. Get it wrong, and you're looking at frustration, wasted money, and even potential failure.
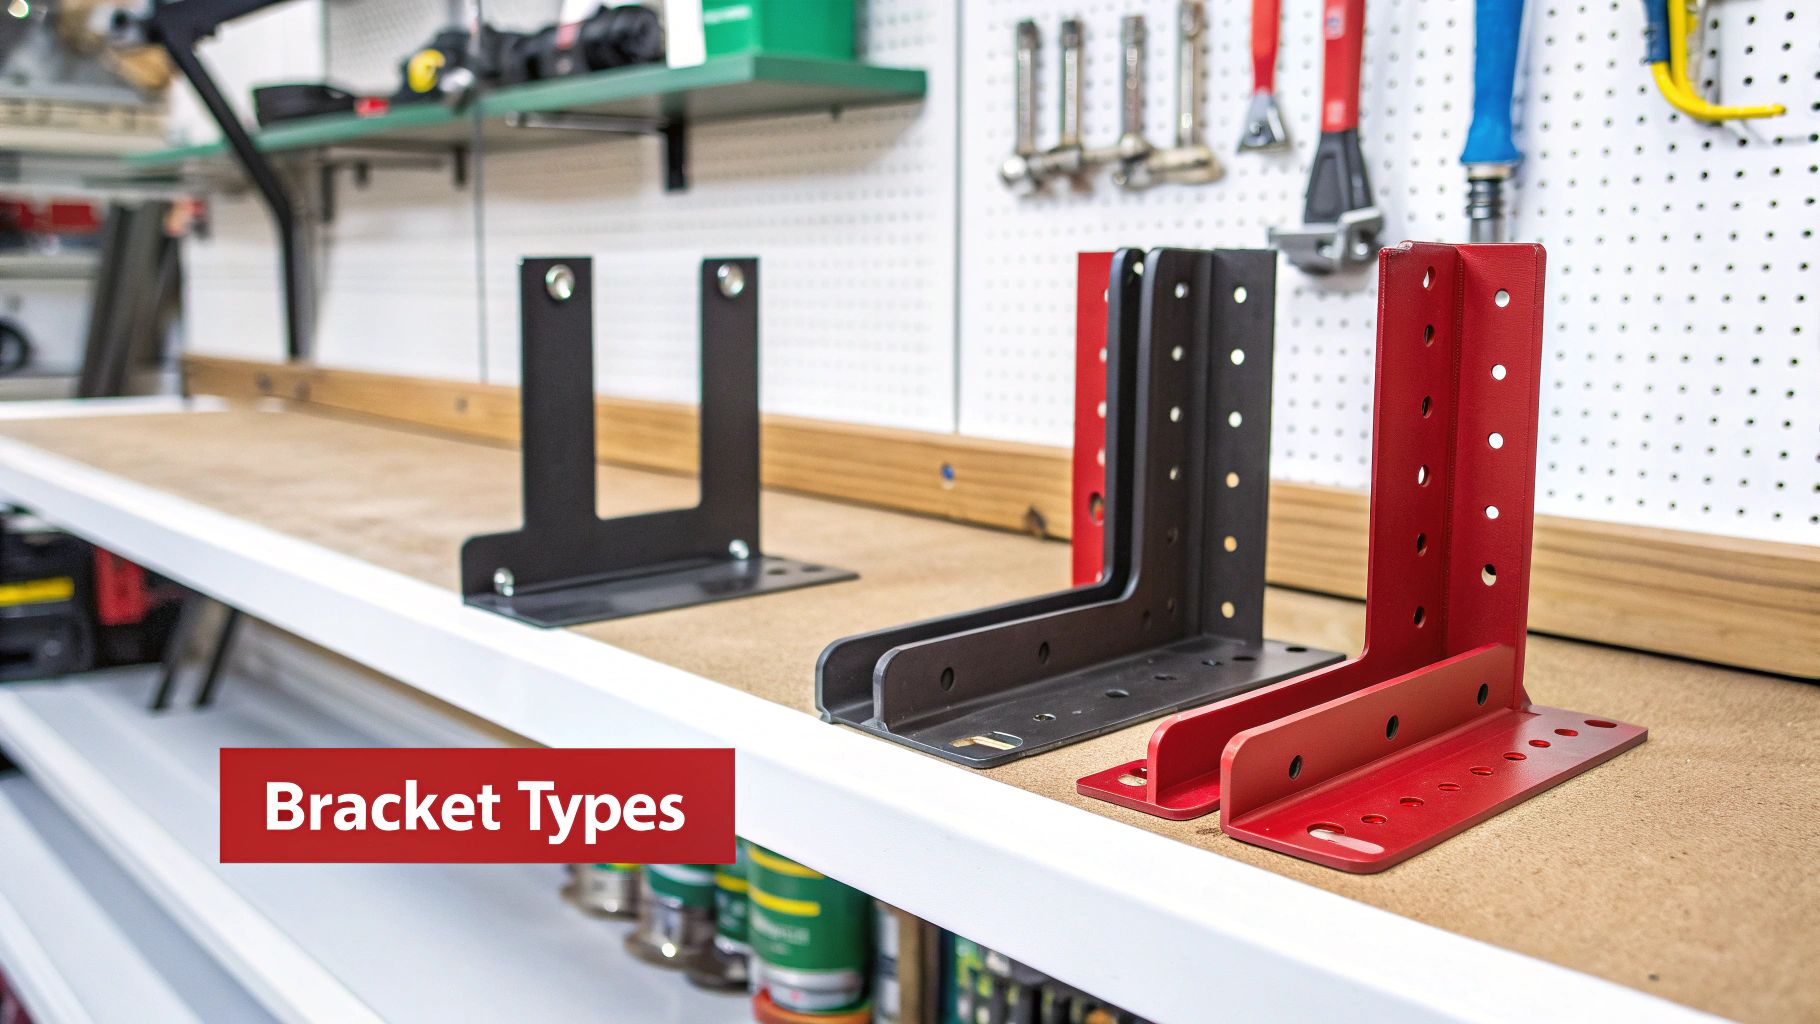
It’s about more than just finding a bracket that looks strong enough. You need to zero in on two critical factors before anything else: the material of the bracket itself and, just as importantly, its load capacity.
Matching Material to Your Environment
Shipping containers, particularly here in the UK with our famously damp climate, are magnets for condensation. This moisture can be a silent killer for the wrong kind of materials. When you're looking at brackets, you’ll generally find two types of finishes designed to fight back.
-
Powder-Coated Steel: This finish gives you a tough, protective layer that’s good at resisting scratches, chips, and corrosion. It’s a fantastic all-rounder for most general storage inside a container.
-
Galvanised Steel: This process involves coating the steel in a layer of zinc, which offers far superior protection against rust. If your container is going to be in a particularly damp spot or exposed to the elements, galvanised brackets are the more resilient, tougher choice.
Think of it this way: if you’re just storing dry archive boxes or tools in a container with decent ventilation, powder-coated steel will probably be fine. But if you’re storing equipment that might be put away wet, or if the container itself struggles with ventilation, paying a bit more for galvanised steel is a very smart long-term move.
Calculating Your Load Capacity
Next up is the honest part: figuring out what you’re actually going to store on these shelves. One of the most common mistakes I see is people underestimating the total weight, which can lead to dangerously overloaded shelves and a catastrophic collapse. Don't just guess—do the maths.
A standard archive box packed with paper, for example, can easily weigh up to 15kg. If you plan to stack ten of those on a single shelf held up by two brackets, that’s a 150kg load those two brackets need to handle safely. Now, imagine you're storing heavy engineering parts, where a single component could weigh 50kg or more. The numbers add up fast.
Always choose brackets with a load capacity that comfortably exceeds your maximum estimated weight. It’s far better to have a system that is over-engineered for your needs than one that is pushed to its absolute limit.
The massive growth of the container self-storage industry in the UK really shows how vital proper organisation is. With projections showing over 111,500 containers in use at storage sites by mid-2025, operators rely on dependable shelving to turn these steel boxes into efficient, rentable units. You can explore the full report on the UK container storage market to see just how big this trend is.
For a practical look at what's out there, you can browse a complete range of container shelving solutions to see how different designs are built for various weight requirements. Making an informed choice now will save you a world of time, money, and hassle down the line.
Preparing Your Container for Installation
Before you even think about fitting your new shipping container shelving brackets, a bit of prep work will make a world of difference. Trust me, jumping straight into installation without checking the basics is a common mistake that almost always leads to an unstable or short-lived shelving system.
A solid foundation is everything, not just for the shelves but for the container itself. Taking an hour to prepare the space properly ensures your brackets will fit securely, your shelves will sit level, and whatever you’re storing will stay safe and dry.
Start with a Clean and Sound Base
First things first, give the interior a thorough clean. Sweep out any rubbish and wipe down the corrugated walls, paying close attention to the lashing points or D-rings where your brackets will attach. Any lingering dirt, grease, or rust can stop the brackets from sitting flush and getting a proper grip.
Next up, give those lashing points a quick inspection. You need to be sure they are free from significant rust or damage and are still securely welded to the container frame. These little points are the anchors for your entire shelving system, so their integrity is non-negotiable.
While you're at it, double-check that the container itself is on solid, level ground. A container that’s even slightly off-kilter can put uneven stress on the shelving brackets and cause your shelves to slope. If you're unsure, our guide offers some practical advice on how to level a shipping container properly.
A clean, level, and structurally sound container is the perfect canvas for your installation. Skipping this stage is like building a house on a shaky foundation—it's bound to cause problems down the line.
Plan Your Layout and Manage Moisture
With a clean slate, you can start planning your layout. Think about what you'll be storing and how you need to access it. Grab a tape measure and some chalk to mark out exactly where your brackets and shelves will go. Don't forget to consider the height of your items to make sure you leave enough vertical space on each shelf.
Condensation is a persistent issue in UK containers, so dealing with it before you install shelves is a smart move. If you spot any signs of moisture, it's worth looking into better ventilation or even adding some insulation. Installing shelves can restrict airflow, which can make condensation worse behind the units and put your stored goods at risk of damp.
Here's your final pre-installation checklist:
- Clean Interior: Make sure the walls and lashing points are completely clean.
- Inspect Anchors: Verify the D-rings are secure and free from any major corrosion.
- Mark Your Layout: Clearly mark out shelf heights for a consistent and organised setup.
- Address Damp: Take steps to manage condensation before it becomes a bigger headache.
Your Practical Installation Guide
Alright, let's get down to the hands-on part. Fitting your shipping container shelving brackets is a pretty straightforward job, but getting it right is absolutely vital for safety and long-term stability. This guide will walk you through the process for the most common systems out there—the no-weld, no-drill kind—so you can get a professional, secure result without putting a single hole in your container.
First things first, let's get your tools together. You won’t need a full workshop, but a few key items will make the job much smoother and more accurate. A good spirit level, a reliable tape measure, and the right size spanners or sockets for your bracket bolts are non-negotiable.
Attaching the Brackets Securely
The real beauty of these modern systems is that they cleverly use the container’s existing lashing points, often called D-rings. Start by finding the D-rings you want to use, which are usually located along the top rail of the container wall. Most brackets are designed with a hook or a curved section that just slots right into this ring. It's a simple, smart design.
Once it's hooked in, the bottom of the bracket should sit flush against the corrugated wall. Hand-tighten any bolts to hold it in place, then grab your spirit level. You need to make sure the bracket is perfectly vertical. I can't stress this enough—even a slightly angled bracket will leave you with sloping shelves, so take your time here. When you're happy it's level, tighten the bolts fully with your spanner.
The golden rule here is level and tight. Use your spirit level on every single bracket before you give it that final tighten. This small check saves a massive headache later when you realise your brand new shelves aren't sitting flat.
This simple diagram breaks down the three core stages of the installation.
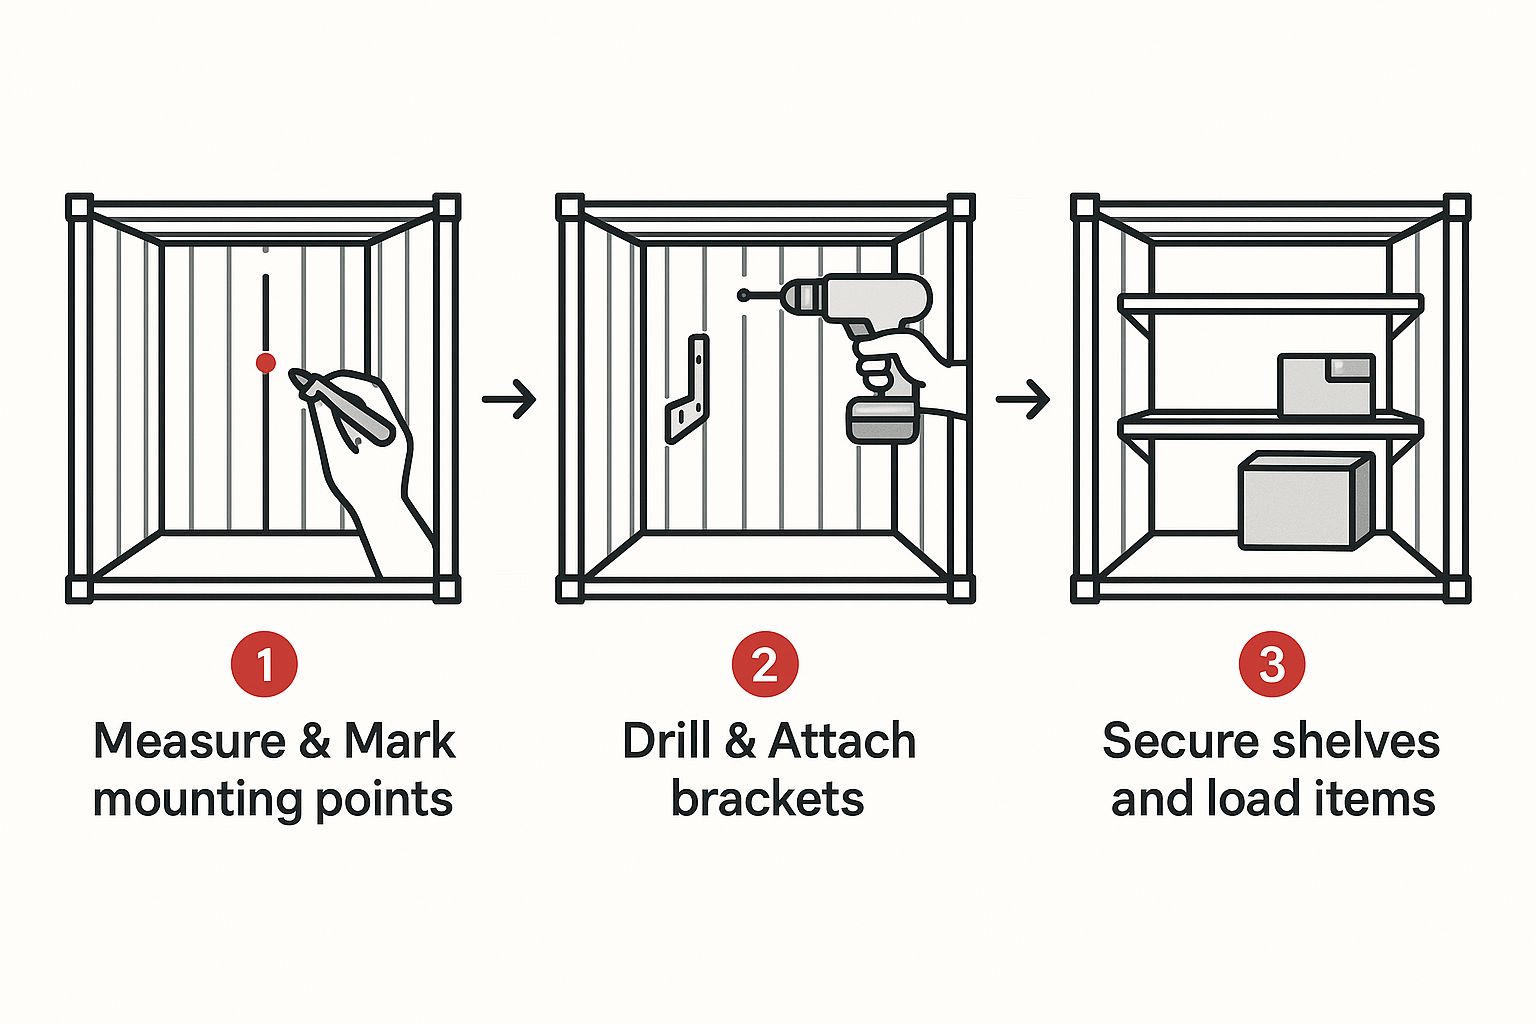
As you can see, a methodical approach is the key to a safe and solid setup from start to finish.
Your Installation Toolkit and Safety Checklist
Before you start bolting anything on, it's worth taking a moment to gather the right gear and run through a quick safety check. Having everything you need to hand stops you from cutting corners, and a quick once-over of your workspace can prevent simple accidents.
| Tool or Item | Why You Need It | Quick Safety Check |
|---|---|---|
| Spirit Level | To ensure every bracket is perfectly vertical for flat, stable shelves. | Is the vial clear and easy to read? |
| Tape Measure | For accurate spacing between brackets and cutting shelf boards to size. | Is the tape undamaged and the markings clear? |
| Spanners/Socket Set | To securely tighten the bracket bolts to the manufacturer's spec. | Do you have the exact size needed to avoid stripping the bolts? |
| Step Ladder | For safely reaching the top lashing points without overstretching. | Is it stable on the container floor? All feet firmly planted? |
| Safety Gloves | To protect your hands from sharp edges or getting pinched. | Are they a good fit and free from holes or tears? |
| Safety Goggles | To protect your eyes from any dust or debris, especially when cutting boards. | Are the lenses clean and unscratched? |
This isn't an exhaustive list, but it covers the essentials for a safe and successful installation. Taking five minutes to prepare properly is always time well spent.
Sourcing and Fitting Your Shelf Boards
With your brackets firmly in place, it's time for the shelves themselves. The material you pick really comes down to what you'll be storing.
- Scaffold Boards: At 38mm thick, these are my top recommendation for anything heavy-duty. They're incredibly strong and perfect for things like tools, engine parts, or hefty equipment.
- Plywood or OSB: If you're storing lighter items like archive boxes or general supplies, an 18mm sheet of plywood or Oriented Strand Board is a great, cost-effective choice that’s still plenty sturdy.
Measure the distance between your installed brackets and cut your boards to the right length. Here's a tip from experience: always treat wooden shelving with a coat of paint or a good sealant. It adds a crucial layer of protection against the damp and condensation that can sometimes build up inside a container.
Once your boards are cut and prepped, just lay them across the brackets. To stop them from shifting or sliding around, you absolutely must fix them in place. Many brackets come with pre-drilled holes, making it easy to drive screws up from underneath to secure the boards. For other jobs in your container, especially when fixing to a plywood floor, you might find specialised shipping container floor tapping screws really useful.
Final Safety Checks Before Loading
Before you even think about loading up your new shelves, do one last check. Go along each bracket and make sure every single bolt is tight. Give the shelves a firm push and a good shake to check for any wobble or movement.
And when you do start loading, always put your heaviest items on the lower shelves. This keeps the centre of gravity low and adds to the overall stability of everything inside your container. It's a simple precaution, but it's a vital part of safe, organised storage.
Getting Your New Shelves Shipshape
Once your shipping container shelving brackets are locked in and the shelves are up, the real fun starts. Getting everything organised isn't just about making it look tidy—it's about creating a safe, efficient space that works for you.
First things first: think about weight distribution. It's tempting to just start loading things up, but you'll want to be smart about it. Never pile all your heaviest gear in one area, as that puts a huge strain on a single bracket. A good rule of thumb is to keep the bulky, heavy equipment on the lower shelves. This creates a low centre of gravity and keeps the whole setup stable.
Creating a System That Actually Works
To make your container truly functional, you need a system. Start by mapping out dedicated zones for different types of items. You might have one corner for tools, another for supplies, and a separate section for archived files. This simple bit of planning will save you countless hours of rummaging around later.
Once you have your zones, take it a step further with clear labels and the right containers.
- Label Everything: Seriously, everything. A bold marker or a cheap label maker is your best friend here. It’s a tiny bit of effort upfront that pays off every single time you need to find something.
- Use Good Storage Bins: Clear plastic bins are brilliant because you can see what’s inside without having to open them. For heavier stuff, go for sturdy, stackable crates.
- Keep Your Aisle Clear: It sounds obvious, but always leave an unobstructed walkway down the middle of the container. It's a basic safety rule that makes accessing everything a breeze.
The demand for this kind of organisation is exploding, especially in the UK's self-storage market. In 2024, the sector brought in nearly £1.2 billion, and a huge number of the 1,135 container-based sites depend on solid shelving to keep customers happy. With 24% of users running a business from their units, reliable shelving isn't a luxury—it's essential for managing inventory. You can read more about the surging UK container storage market and see just how vital quality fittings have become.
Looking After Your Shelves for the Long Haul
Your shelving is an investment, and just like any other piece of kit, it needs a bit of care. Given the damp UK climate, regular checks are a must, especially inside a steel box where condensation can be a real headache.
Pop a reminder in your calendar to do a quick inspection every couple of months. You're looking for any signs of corrosion on the steel brackets, paying close attention to the bolts and joints. If you catch any surface rust, just clean it off and give it a touch-up with some metal paint to stop it from spreading.
Don’t forget to check your wooden shelves, too. Look for any bowing, warping, or damp spots. If a shelf starts to sag, that’s a clear signal it’s either overloaded or has been weakened by moisture.
A quick five-minute check every quarter is all it takes to catch problems before they become serious. This proactive habit will keep your shelving safe, secure, and doing its job for years.
Still Have Questions About Container Shelving?
Even with a solid plan in hand, it’s completely normal to have a few last-minute questions before you start fitting out your container. We get it. Here are the answers to some of the most common queries we hear about shipping container shelving brackets, designed to give you the clarity you need to get the job done right.
Can I Really Install Brackets Without Drilling into My Container?
Yes, you absolutely can – and honestly, you should. The best modern shipping container shelving brackets are designed specifically for ‘no-drill, no-weld’ installation. It's a clever system where the brackets clamp securely onto the container's existing D-rings or lashing points, using the built-in strength of the frame to create an anchor point that’s as solid as a rock.
This approach is just smarter for a few reasons. First off, you're not compromising the structural integrity of your container. Just as important, you’re keeping it completely watertight, which is a massive deal for protecting your gear. This is especially true if you’re renting the container or thinking you might sell it down the line.
Choosing a no-drill system is the best way to add seriously robust storage without devaluing or damaging your container. It’s a completely non-destructive method that delivers maximum strength and versatility.
What’s the Best Material to Use for the Actual Shelves?
The right material for your shelf boards really hinges on what you plan to pile on top of them. You’re looking for the sweet spot that balances strength, durability, and cost for what you need.
Here’s a quick rundown of the most popular choices we see:
- Scaffold Boards: If you're storing genuinely heavy stuff like tools, machine parts, or bulky equipment, 38mm thick scaffold boards are a brilliant, bomb-proof choice. They can take a beating and handle some serious weight.
- Plywood or OSB: For lighter loads—think archive boxes, general supplies, or retail stock—18mm plywood or Oriented Strand Board (OSB) hits that perfect balance of strength and value.
No matter which one you go for, we always recommend treating any timber with a good sealant, varnish, or paint. This adds a crucial layer of protection against the damp and condensation that can build up inside a container, stopping the wood from warping or rotting over time.
How Much Weight Can These Brackets Actually Take?
Load capacity isn't a simple, one-size-fits-all number; it changes dramatically depending on the bracket design and who made it. This is probably one of the most critical specs to check before you buy.
Lighter-duty brackets might be rated for around 50kg each, which is more than enough for general storage. On the other end of the scale, you’ve got heavy-duty industrial systems engineered to support 250kg per bracket or even more, making them perfect for tough commercial or workshop setups.
Always do a quick calculation of the total weight you’re planning to load onto each shelf and make sure the combined capacity of your brackets is well above that. For safety and the long life of your setup, it's also vital to spread the weight as evenly as you can across the length of the shelf.
For a complete range of no-drill brackets and expert advice tailored to your project, explore the solutions at Quickfit Container Accessories. We offer next-day UK delivery on high-quality fittings designed to make your container conversion a success. Visit us at https://www.quickfitcontaineraccessories.co.uk.