Website Orders To Northern Ireland & Republic Of Ireland and USA Now Available!


A Guide to Shipping Container Levelling
Getting your shipping container perfectly level is the single most important step you can take. Skip this, and you're setting yourself up for a world of pain: jammed doors, water pooling on the roof, and serious structural strain. Over time, these issues can cause permanent damage, turning your solid steel box into a warped, leaky problem. It’s the absolute foundation of any container project.
Why a Level Container is Your Project's Foundation

Before you even think about tools or site prep, let's get one thing straight: levelling a container isn't just a minor detail—it’s everything. An unlevel container is a ticking clock, transforming a durable, reliable structure into a source of constant frustration.
We’ve seen the real-world consequences of cutting this corner too many times. The first and most annoying problem you'll hit is with the doors. If the container frame is twisted even slightly, those heavy cargo doors will bind, making them a nightmare to open and close. Sometimes, they won't budge at all.
Structural Integrity and Load Distribution
Shipping containers are engineering marvels, designed to be stacked nine-high on ships while carrying tonnes of cargo. But all that strength hinges on one critical design principle: the entire load is supported by the four corner castings. These are the heavy-duty, reinforced steel blocks at each corner that cranes and other containers lock into.
When you plonk a container on an uneven surface, that weight distribution goes out the window. Instead of being spread evenly across all four corners, one or two might take the brunt of the load, while the others barely make contact. This imbalance puts immense torque and stress across the entire steel frame.
A container's frame is built for compression and tension in straight lines. When you twist it by placing it on an unlevel surface, you introduce forces it was never designed to handle. That’s the number one cause of warping and door alignment headaches.
Over time, this relentless strain leads to some pretty serious issues:
- Frame Warping: The long steel beams that make up the container's skeleton can start to twist, compromising the whole unit's structural integrity.
- Floor and Wall Stress: Uneven loads can cause the plywood flooring to buckle and put huge stress on the welded seams of the corrugated steel walls.
- Accelerated Rust: An unlevel container almost always creates low spots on the roof. Rainwater pools there instead of draining off, which massively speeds up the rusting process and leads to leaks and expensive repairs.
The Bedrock of Your Container Project
It doesn't matter if you're planning a simple garden shed, a secure workshop, or an ambitious container home—a level base is the absolute bedrock of your build. Forgetting this fundamental step means any customisation you do later, from fitting windows and doors to adding internal walls, will be built on an unstable and unreliable foundation.
Making sure your container is perfectly level from day one protects your investment, guarantees it will function as it should, and prevents a whole cascade of future problems. It is the most important thing you can do to ensure your container serves you well for decades to come.
Preparing Your Site for a Stable Container Base
A successful levelling project starts long before the shipping container even shows up on a lorry. Think of it this way: the long-term stability of your entire setup rests completely on the ground beneath it. This isn’t about just finding a flattish patch of grass; it’s about creating a solid, well-drained base that can handle thousands of kilograms for years, especially with our notoriously damp and shifting UK climate.
Skipping this vital first stage is a rookie error that almost always leads to subsidence, drainage nightmares, and a constant fight to keep the container doors swinging freely. A bit of proper prep work now will save you a world of headaches later.
Conducting a Thorough Site Assessment
Before you even think about picking up a shovel, take a good walk around your chosen spot with a critical eye. You're on a mission to spot potential problems that could undermine your foundation down the line.
Get a feel for the ground itself. Is it soft clay that turns to mush after a downpour, or is it firm, sandy soil that drains well? A simple test is to press your heel firmly into the ground in a few different places. If it sinks in easily, you know you'll need to put in some extra work to reinforce the base.
Also, be mindful of what’s hiding underground. Are there any utility lines, water pipes, or old foundations buried in the area? A quick call to check local plans can prevent a very expensive and dangerous mistake. Keep an eye out for tell-tale signs of poor drainage, like boggy patches or standing water, as these hotspots will need to be dealt with to stop your foundation from shifting.
Clearing and Grading Your Container Pad
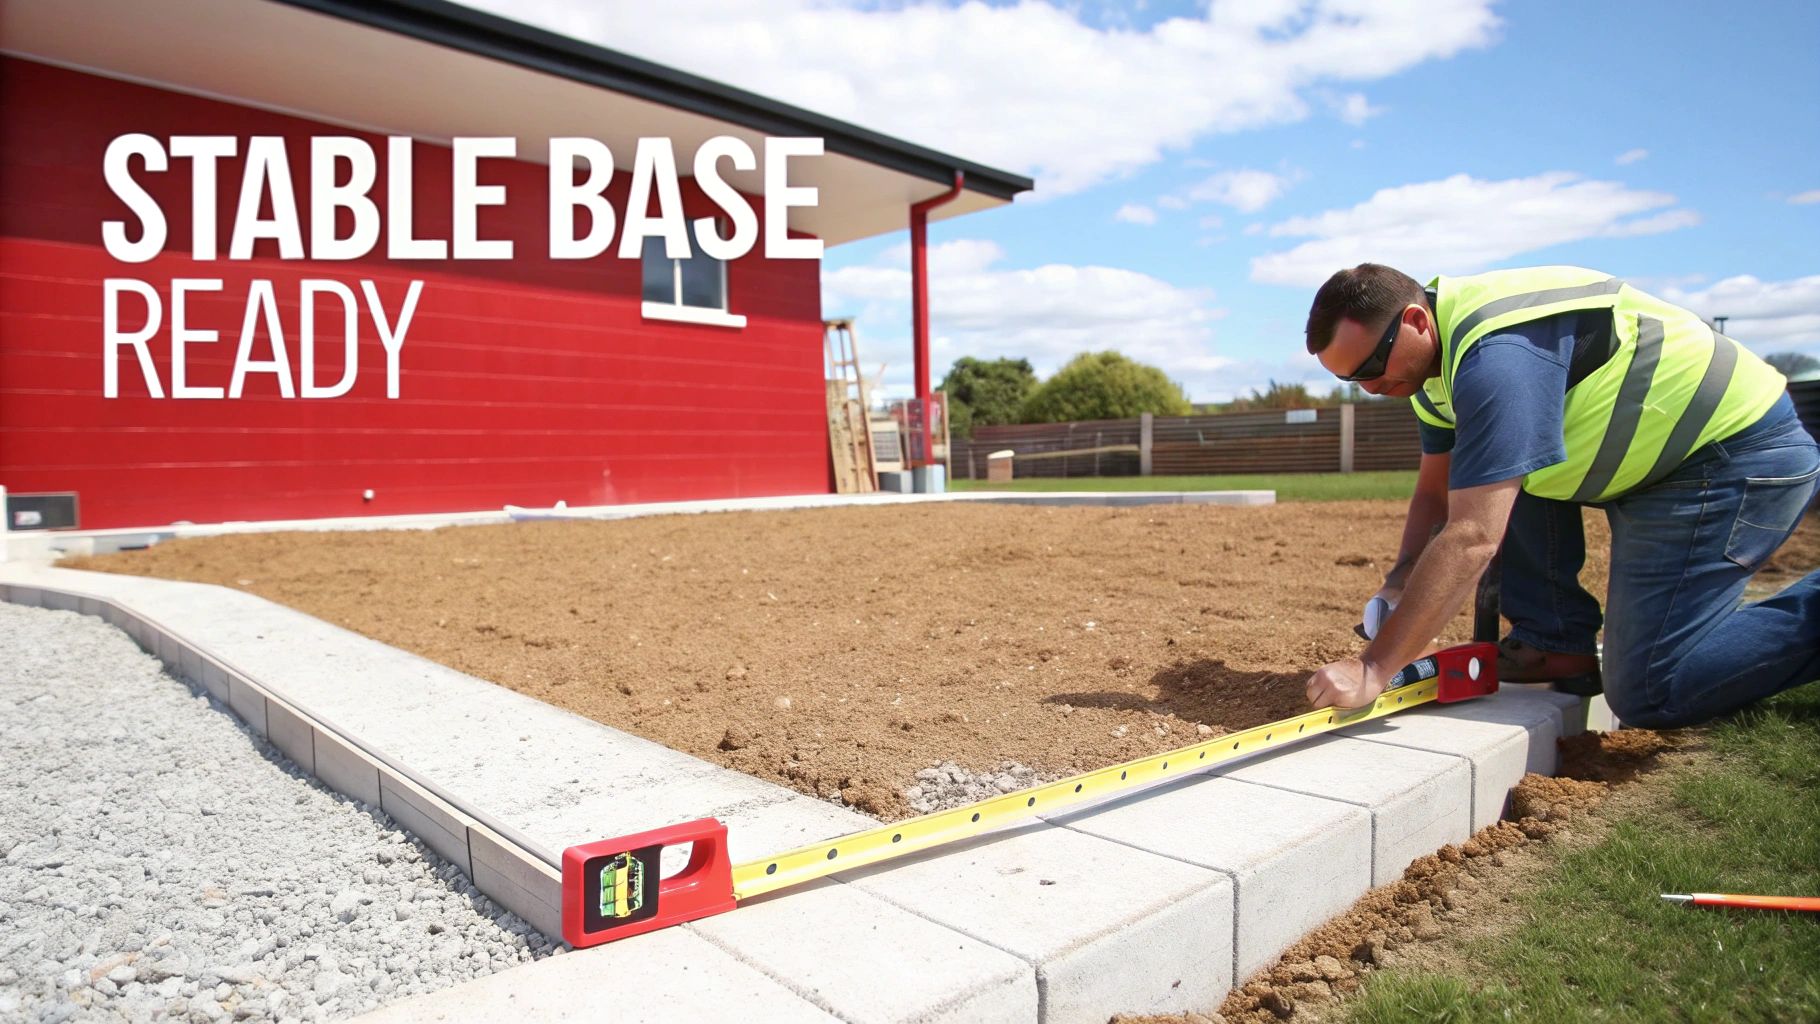
Once you've done your reconnaissance, it's time for the physical work to begin. First, mark out the footprint for your container. A good rule of thumb is to add at least a metre on all sides. This gives you a stable area to work on and, crucially, helps with water run-off.
Start by stripping away all the organic stuff from this area – that means grass, weeds, roots, and the topsoil. Leaving this layer in place is a recipe for disaster. It will inevitably decompose and compress over time, causing the ground to sink unevenly and throwing your container out of level.
The single biggest mistake we see is people placing containers directly on topsoil or grass. Over the first year, as the organic matter breaks down, you can guarantee the container will settle and go out of level. Always strip the ground back to a firm, inorganic sub-base.
With the area cleared, the next job is grading. The goal here is a surface that is as flat and level as you can possibly get it. Use a shovel and rake to knock down the high spots and fill in the low ones, tamping the ground down firmly as you go. For a truly professional finish, hiring a plate compactor for a day is money well spent. It packs the ground down so densely that it’s far less likely to settle later on.
Planning for Effective Drainage
Here in the UK, water management is everything. A foundation sitting in a puddle will eventually fail, so planning for good drainage is absolutely critical. Your graded area should have a very slight slope – just 1-2 degrees is enough – to guide water away from the container's base.
This gentle gradient ensures rainwater doesn’t pool around or underneath your foundation, which can lead to soil erosion and subsidence. For sites with heavy clay soil or naturally poor drainage, adding a simple French drain or a gravel-filled trench around the perimeter is an excellent move.
Proper ground preparation is a detailed job, but it's the only way to guarantee your shipping container stays put. For a deeper dive, this expert site preparation excavation guide offers some fantastic professional insights. Once your base is solid, it's ready for your chosen foundation, like a sturdy shipping container levelling slab, which will help spread the load evenly and securely.
Choosing the Right Foundation for Your Project
With your site prepped and ready, it's time for the next big decision: the foundation. This isn't a one-size-fits-all job. The best choice really depends on your site's conditions, your budget, and what you plan to do with the container. Get this part right, and your efforts to level your shipping container will pay off for years to come.
Not all foundations are created equal. A full concrete slab gives you ultimate stability, but it might be expensive overkill if you're just using the container for simple storage. On the other hand, concrete piers can be a solid, cost-effective alternative—especially perfect for the uneven or sloping ground so common across the UK.
Comparing Common Foundation Options
To make a smart choice, you need to understand the pros and cons of each method. Let's break down the most popular options to help you match the foundation to your project's specific needs and budget.
-
Concrete Slab: This is the gold standard if you're looking for permanence and stability. A reinforced concrete slab creates a solid, level base that spreads the container's weight evenly. It’s ideal for container homes, workshops, or any long-term setup where you can't have any ground movement. The downside? It's also the most expensive and labour-intensive option.
-
Concrete Piers: A brilliant compromise between stability and cost. This method involves digging footings at each of the four corners (and maybe the mid-points for a 40ft container) and pouring concrete piers. They are fantastic for uneven terrain because you can build the piers to different heights to create a perfectly level surface for the container.
-
Paving Slabs: For lighter-use scenarios on firm, well-drained ground, heavy-duty paving slabs under each corner can be a simple and affordable fix. While not as permanent as concrete, they do a great job of stopping the container from sinking into the soil. Just make sure you use thick, high-quality slabs.
-
Railway Sleepers: Reclaimed or new railway sleepers offer a rustic and effective foundation. When placed on a compacted gravel bed, they spread the load well and give you decent ground clearance. Remember to use treated timber to prevent rot and get them perfectly level before the container arrives.
Making a Practical Choice for Your Container
For most standard storage jobs on relatively flat ground, a well-prepared gravel base with either concrete paving slabs or railway sleepers is more than enough. This approach gives you excellent drainage and a stable footing without the major cost and hassle of a full concrete slab.
But if you're planning a more ambitious conversion, like an office or a living space, investing in concrete piers or a full slab is a very good idea. That extra stability is crucial for making sure windows, doors, and internal fittings stay perfectly aligned down the line. When thinking about the best foundation, it’s helpful to understand general steel building foundation requirements, as a lot of the same principles apply.
Comparison of Container Foundation Methods
To make things even clearer, here’s a straightforward comparison of the most common foundation methods we see used for levelling shipping containers in the UK.
| Foundation Type | Typical Cost (£) | Durability | Installation Complexity | Best For |
|---|---|---|---|---|
| Concrete Slab | £2,500 - £5,000+ | Very High | High | Permanent installations, conversions, poor soil |
| Concrete Piers | £800 - £2,000 | High | Medium | Uneven ground, sloping sites, long-term use |
| Paving Slabs | £100 - £300 | Medium | Low | Firm, level ground, temporary or storage use |
| Railway Sleepers | £200 - £500 | Medium-High | Low | Good drainage, moderate use, aesthetic appeal |
Ultimately, the goal is to find the right balance between cost, how permanent you need it to be, and what your site can handle.
Remember, the foundation's main job is to transfer the container's load to the ground without anything shifting or settling. The costlier options provide more certainty, but a simpler method done correctly can be just as effective for the right application.
No matter which foundation you go with, pairing it with high-quality components is the key to success. Using purpose-built products, like our versatile shipping container levelling pads, can make those final adjustments much easier and guarantee a perfectly stable base for years to come.
A Practical Guide to Lifting and Levelling Your Container
With your foundation prepped and ready, it's time to get hands-on. This is where we move from planning to practice, physically lifting and adjusting your container until it’s perfectly level. Getting this right takes the proper tools, a bit of patience, and a serious focus on safety.
The process is pretty straightforward once you get the hang of it: lift each corner, make tiny adjustments with shims, and check your work obsessively until the whole unit is sitting perfectly balanced.
Assembling Your Levelling Toolkit
Before you even think about lifting anything, make sure you've got the right kit. Trust me, trying to cut corners with the wrong tools is not only a massive headache but also downright dangerous. A well-stocked toolkit will make the job safer, faster, and far more accurate.
Here’s what you absolutely need:
- A Heavy-Duty Bottle Jack: Your standard car jack just won’t do. You need a bottle jack rated for at least 10-20 tonnes to handle the dead weight of an empty container without breaking a sweat.
- A Long Spirit Level: A 4-foot (1.2m) spirit level is non-negotiable for getting an accurate read across the container's length and width. Anything smaller is just not precise enough for this kind of job.
- Durable Shims or Packers: These are for the fine-tuning under each corner. Steer clear of untreated wood, as it will just rot away. Your best bet is steel plates, high-density plastic packers, or solid blocks of pressure-treated hardwood.
- A Crowbar or Pry Bar: This will be your best friend for nudging shims into place once a corner is lifted.
The Safe Lifting Procedure
Safety has to be your number one priority here. A shipping container is an incredibly heavy beast, and a single mistake during lifting can lead to serious injuries or a ruined container.
The golden rule is to only ever place your jack directly under the corner castings. These are the chunky, reinforced steel blocks at each of the four corners, specifically designed to take the container's full weight. Never, ever try to lift from the middle of a side rail—it will buckle the steel and cause permanent, costly damage.
When you’re set, lift one corner at a time. Raise it just enough to slide your shims underneath. We're talking a few inches at most.
Safety First: At no point should any part of your body go underneath the container while it's on a jack. Jacks can and do fail. Once a corner is lifted, get your shims in and lower the container back down before you even think about moving to the next corner.
The Art of Shimming for a Perfect Level
Shimming is where the real magic happens. With a corner jacked up, you'll slide your shims into the gap between the corner casting and your foundation, whether that’s a concrete pier, a paving slab, or a sleeper. The idea is to build up layers until the gap is completely filled.
Start by laying your spirit level on the floor inside the container, running it along the long side from one corner to the other. If that little bubble isn't dead centre, you know which end needs to come up. Add or remove shims as required, lower the container, and check again. You'll repeat this dance for both long sides and both short ends.
This infographic breaks down the thinking that goes into choosing a foundation, which is a massive factor in how you'll tackle the levelling process.
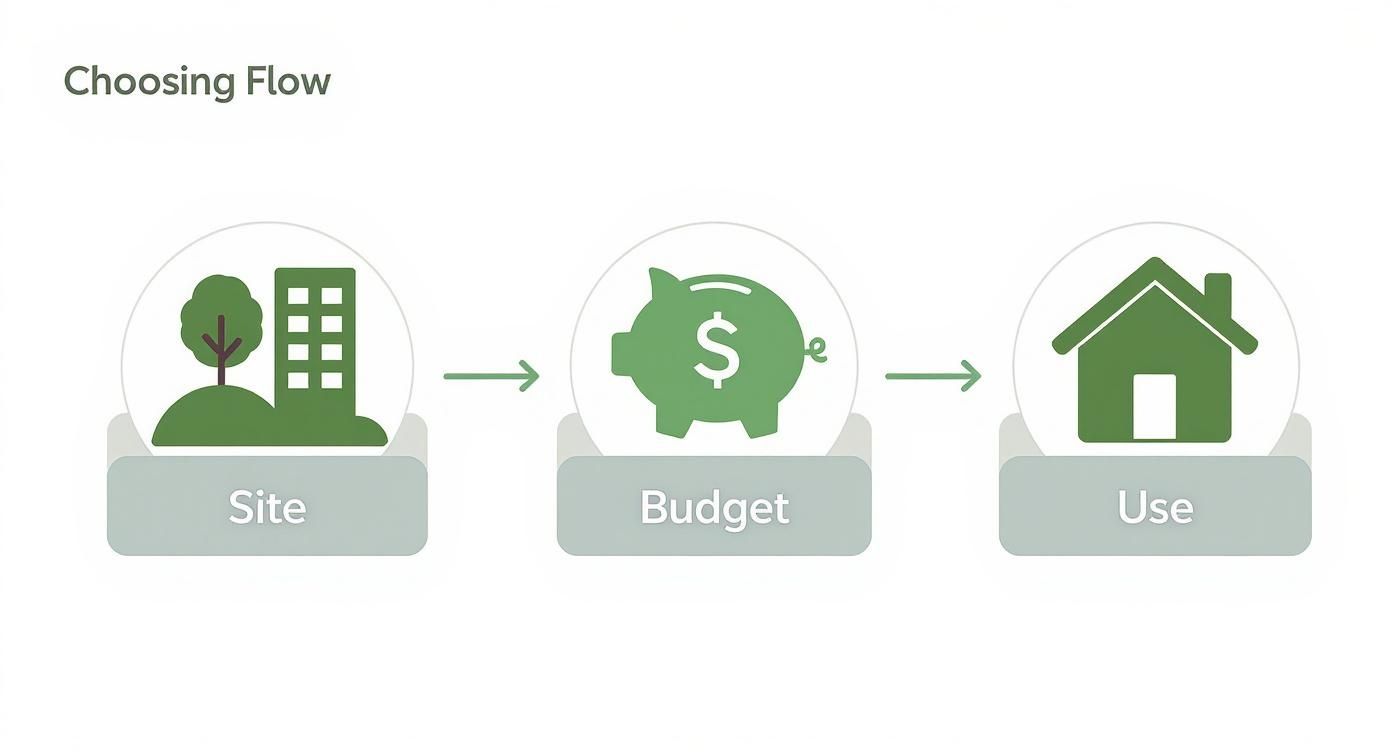
As you can see, your site conditions, budget, and what you’re using the container for are the big three factors. They dictate the best foundation, which in turn dictates the levelling approach you’ll need to take.
Final Checks: The Diagonal and Door Swing Tests
Once you think you've got it level along all four sides, it's time for the real tests of truth. First, place your spirit level diagonally across the floor, from one corner to its opposite. If the container is truly level, the bubble will be perfectly centred here, too. If it's off, it means there's a slight twist in the frame you might have missed.
But the ultimate confirmation is the door swing test. Open both cargo doors all the way, then give them a gentle push to close. On a perfectly level container, they should swing smoothly and line up with the frame without any catching or binding. If one door swings shut faster than the other or they feel stiff, you’ve still got a bit of tweaking to do.
A clean door swing is the final sign-off on a job well done. For those who do this often, investing in a specialised container jack set can make the whole lifting part of the process much quicker and more efficient.
The need for a perfectly level base is even more critical in commercial hubs like ports, where every second counts. In the UK, with road haulage making up around 70% of port traffic, containers have to be placed and levelled on lorries with incredible speed and precision. This heavy reliance on road transport puts immense pressure on the entire logistics chain, making efficient container levelling a vital cog in the machine that keeps goods flowing.
Troubleshooting and Maintaining a Level Container
Even if you’ve done everything by the book with meticulous planning and a rock-solid foundation, the ground beneath your shipping container is almost never static. Over time, seasonal changes, different soil types, and the sheer weight of the container can cause it to settle. This is a completely normal part of the process, but catching it early is the secret to avoiding long-term headaches like jammed doors and structural stress.
Think of your container's level like a car's oil – it needs a periodic check-up. Taking a proactive approach to maintenance means your investment stays secure, functional, and structurally sound for years to come. The best part? Most common issues are surprisingly simple to spot and fix.
Identifying Common Levelling Problems
The first sign that your container has shifted is almost always the doors. One day they swing open freely, and the next they’re stiff, catching on the frame, or refusing to close without a good shove. This is your container's way of telling you that its frame has a slight twist in it.
Another dead giveaway is water pooling on the roof after it rains. If you keep seeing puddles in the same spot, it’s a strong sign that one corner has dropped, creating a low point where water gathers. If you leave it, this can speed up rust and eventually lead to leaks.
The most common culprit for a container going out of level is ground settlement, especially within the first year. Clay soils are notorious for shrinking and swelling with moisture changes, causing foundations to shift. A harsh winter with deep frosts can also heave the ground, throwing all your careful work out of alignment.
These issues aren't a sign that you did something wrong; they’re just a call to action. A quick re-levelling session is usually all it takes to get things back on track.
Practical Solutions for Re-levelling a Settled Container
Fixing a container that’s gone out of level follows the same basic principles as the initial setup, just on a smaller scale. You'll need your trusty heavy-duty bottle jack, a long spirit level, and a good collection of durable shims – steel plates or hard plastic packers are perfect for the job.
Here’s a field-tested approach I’ve used countless times:
- Diagnose the Low Corner: Pop your spirit level on the floor inside the container to figure out which corner or side has dropped. The bubble always moves towards the highest point, so you know the opposite end is the one you need to lift.
- Lift Safely: Position your bottle jack securely under the corner casting of the low corner. Slowly and carefully raise it just enough to create a small gap between the casting and its foundation pad. Don’t go crazy here; you only need a few millimetres.
- Shim and Adjust: Slide your extra shims into the new gap. It’s often surprising how little it takes to correct the issue. Add one shim at a time, gently lower the container, and check again with your level.
- Do the Door Test: Once your spirit level says everything is balanced, give the doors a final swing. If they open and close smoothly without any resistance, your job is done.
Creating a Long-Term Maintenance Checklist
Staying proactive is far easier than dealing with a bigger problem down the line. A simple maintenance schedule will help you stay ahead of any potential levelling issues with your container.
- Quarterly Visual Check: Once a season, just walk around the container. Look for any new gaps appearing between the corner castings and the foundation. Check for any signs of the foundation sinking or cracking.
- Bi-Annual Level Check: Twice a year, pop your spirit level inside and check all four sides. The best times are after the winter frost has thawed and during the driest part of summer, as this is when the ground shifts most.
- Annual Drainage Check: Make sure the ground around the container is still sloped correctly and water is draining away. Clear out any leaves, soil, or debris that has built up and could trap moisture against the foundation.
These maintenance steps are particularly crucial in a dynamic environment like the UK's port system. Recent UK port freight statistics show a complex pattern, with international container traffic growing while domestic traffic has plateaued. This shifting landscape means containers are constantly being moved and redeployed, reinforcing the need for stable and easily maintainable levelling. You can explore the latest cargo information from 2024 for a full breakdown. By following a simple checklist, you ensure your container remains a reliable asset, ready for whatever comes next.
Common Questions About Shipping Container Levelling
Getting a container levelling project right the first time can feel a bit daunting, and it's natural to have questions. To help you tackle the job with confidence, we’ve put together answers to some of the most common queries we get.
From how precise you need to be to dealing with awkward, sloping ground, these quick answers should give you the essential knowledge you need for a successful, long-lasting setup.
How Perfectly Level Does a Shipping container Need To Be?
Honestly, it depends on what you're using the container for. While you don't need millimetre-perfect precision for basic storage, you should still aim for it to be as level as your spirit level can read. The main goal for a simple storage unit is just to make sure the cargo doors open and close smoothly without catching or binding.
However, that all changes when you're converting the container into something more complex, like a workshop, office, or living space. For any project involving plumbing, electrics, and internal walls, that precision becomes critical. Even a slight, barely noticeable slope can cause headaches with drainage, door and window fittings, and even just the general feel of the space.
A good rule of thumb is to grab a 4ft (1.2m) spirit level and check the floor inside the container. Test it along all four sides and then run it diagonally across the middle. If that bubble is perfectly centred in every single direction, you're in great shape. Any visible deviation is a sign of trouble to come.
Can I Level a Shipping container on a Slope?
Yes, you absolutely can, but—and this is a big but—you can't just plonk it directly on the sloping ground and hope for the best. Levelling on a slope is a common scenario, but it requires a proper foundation designed specifically to counteract that uneven terrain.
By far the best and most common method is to use concrete pier foundations. This involves digging footings and building up concrete piers to different heights, creating a single, perfectly level plane for the container to sit on.
- On the uphill side of the slope, the piers will be quite short.
- On the downhill side, you'll need much taller, reinforced piers to make up for the drop in height.
This "step foundation" is an incredibly effective and stable solution for hilly sites. It guarantees your container sits dead level, even when the ground underneath it is anything but.
What Are the Best Materials for Shimming a Container?
When you’re down to making those final, tiny adjustments, the material you use for shimming is crucial for longevity. Whatever you do, avoid materials that will rot, compress, or fall apart over time, like untreated blocks of wood left sitting directly on the ground.
The best shims are non-corrosive, completely weatherproof, and incredibly durable.
- Thin steel plates are an excellent choice. They have immense strength and won't compress under the container's weight.
- Hard plastic packing shims, the kind often used by window fitters, are also ideal. They're totally weatherproof, won't rot, and come in various pre-set thicknesses, making it easy to dial in those fine adjustments.
If you absolutely must use wood to fill a larger gap, make sure it’s pressure-treated hardwood or proper construction-grade packers. And crucially, these must always sit on a solid foundation like a concrete pad or paving slab—never in direct contact with damp soil where they will inevitably fail.
For any project, having the right accessories makes all the difference. Quickfit Container Accessories provides a complete range of high-quality, durable levelling slabs, pads, and other essential fittings to ensure your container is stable and secure from day one. Explore our full range at https://www.quickfitcontaineraccessories.co.uk.