Website Orders To Northern Ireland & Republic Of Ireland and USA Now Available!


A Practical Guide to Steel Shipping Container Shelving
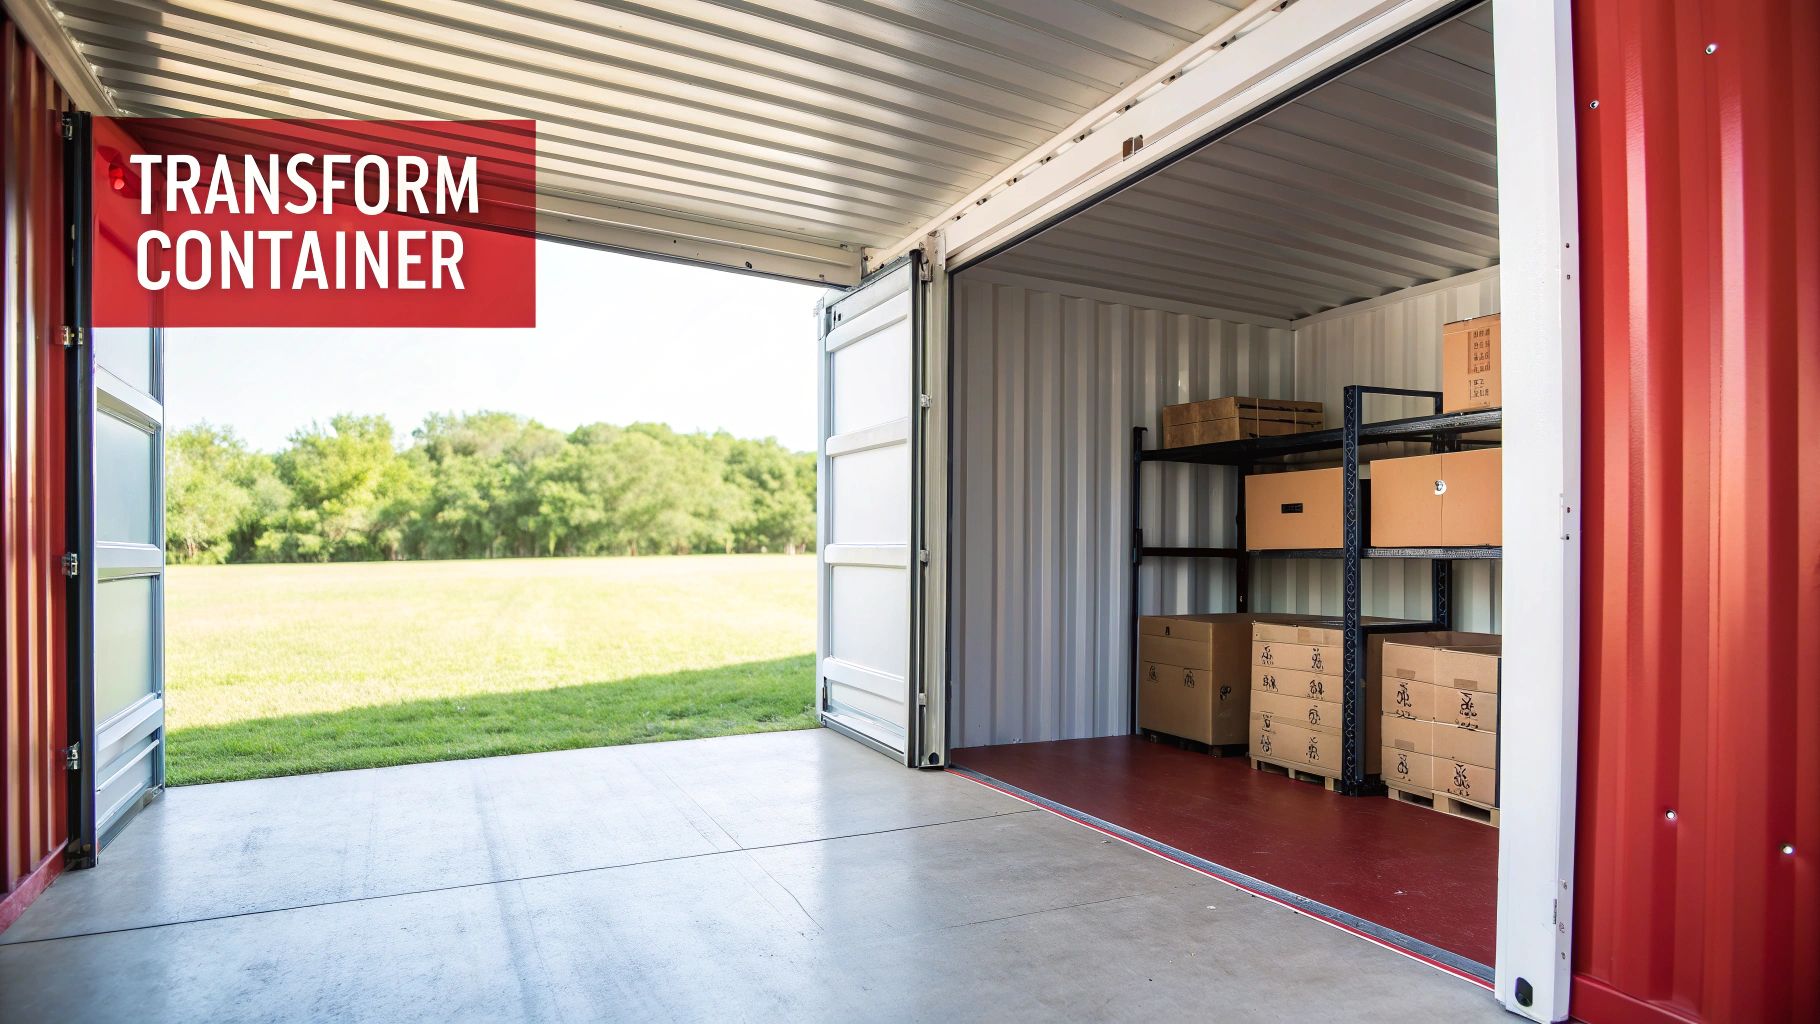
An empty shipping container holds incredible potential, but without proper organisation, it's really just a big steel box. The right steel shipping container shelving is what turns this space from a chaotic jumble into a powerhouse of efficiency, making the most of every square foot.
Transform Your Container with Smart Shelving
Simply put, shelving turns your container from a passive storage space into an active, functional asset.
For a tradesperson, this means grabbing tools and materials instantly instead of wasting precious time digging through piles. If you're running an e-commerce business, it means keeping valuable stock safe from floor damp and damage, ensuring every item is ready to go.
Without a structured system, items get piled high, the floor becomes an obstacle course, and finding what you need turns into a frustrating chore. This mess doesn't just waste time; it puts your equipment and inventory at risk.
Why Steel Is the Only Sensible Choice
In the damp UK climate, your choice of material is everything. While wooden shelves might seem like a cheaper option at first, they're a magnet for moisture, which leads to warping and rot down the line. Steel, on the other hand, offers unmatched durability and resilience against the condensation that inevitably forms inside a container.
A robust steel shelving system gives you several key advantages:
- Superior Strength: It can handle heavy loads without buckling, perfect for everything from power tools to hefty archive boxes.
- Longevity: Powder-coated or galvanised steel fights off rust and corrosion, making sure your investment lasts for years.
- Safety: Getting items off the floor cuts down on trip hazards and makes for a much safer working environment.
A well-organised container isn't just about being tidy; it's about operational efficiency. By using vertical space, you not only declutter the floor but also streamline your entire workflow. You can turn a common storage headache into a serious competitive advantage.
A Growing Trend in UK Storage
Using containers for storage isn't a niche idea anymore; it's a rapidly expanding sector. In the UK's self-storage industry, steel shipping containers have become a cornerstone, fuelling a massive surge in capacity.
According to a recent SSA UK Annual Industry Report, there are now 1,135 container-based storage sites out of 2,915 self-storage facilities nationwide. That accounts for nearly 40% of all locations, showing just how popular they’ve become, especially in rural areas. You can get more insights on these container storage trends from the full report. This data really hammers home how crucial effective internal organisation, like steel shelving, has become.
How to Choose the Right Shelving System
Getting your shelving right is probably the single most important decision you'll make when outfitting a shipping container. It's the difference between a cluttered metal box and a truly functional, organised space. To make a smart choice, you need to get familiar with the main options out there and figure out how they stack up against your specific needs, from load capacity to how much faff is involved in the installation.
It’s no surprise that clever container storage is becoming more popular. The United Kingdom Shipping Container Market is expanding at a compound annual growth rate (CAGR) of 3.08% between 2023 and 2033. This is largely fuelled by a boom in foreign trade and e-commerce, which is putting a huge demand on better warehousing solutions. Dry storage containers, perfect for shelving everything from furniture to electronics, are leading the pack because they’re just so versatile.
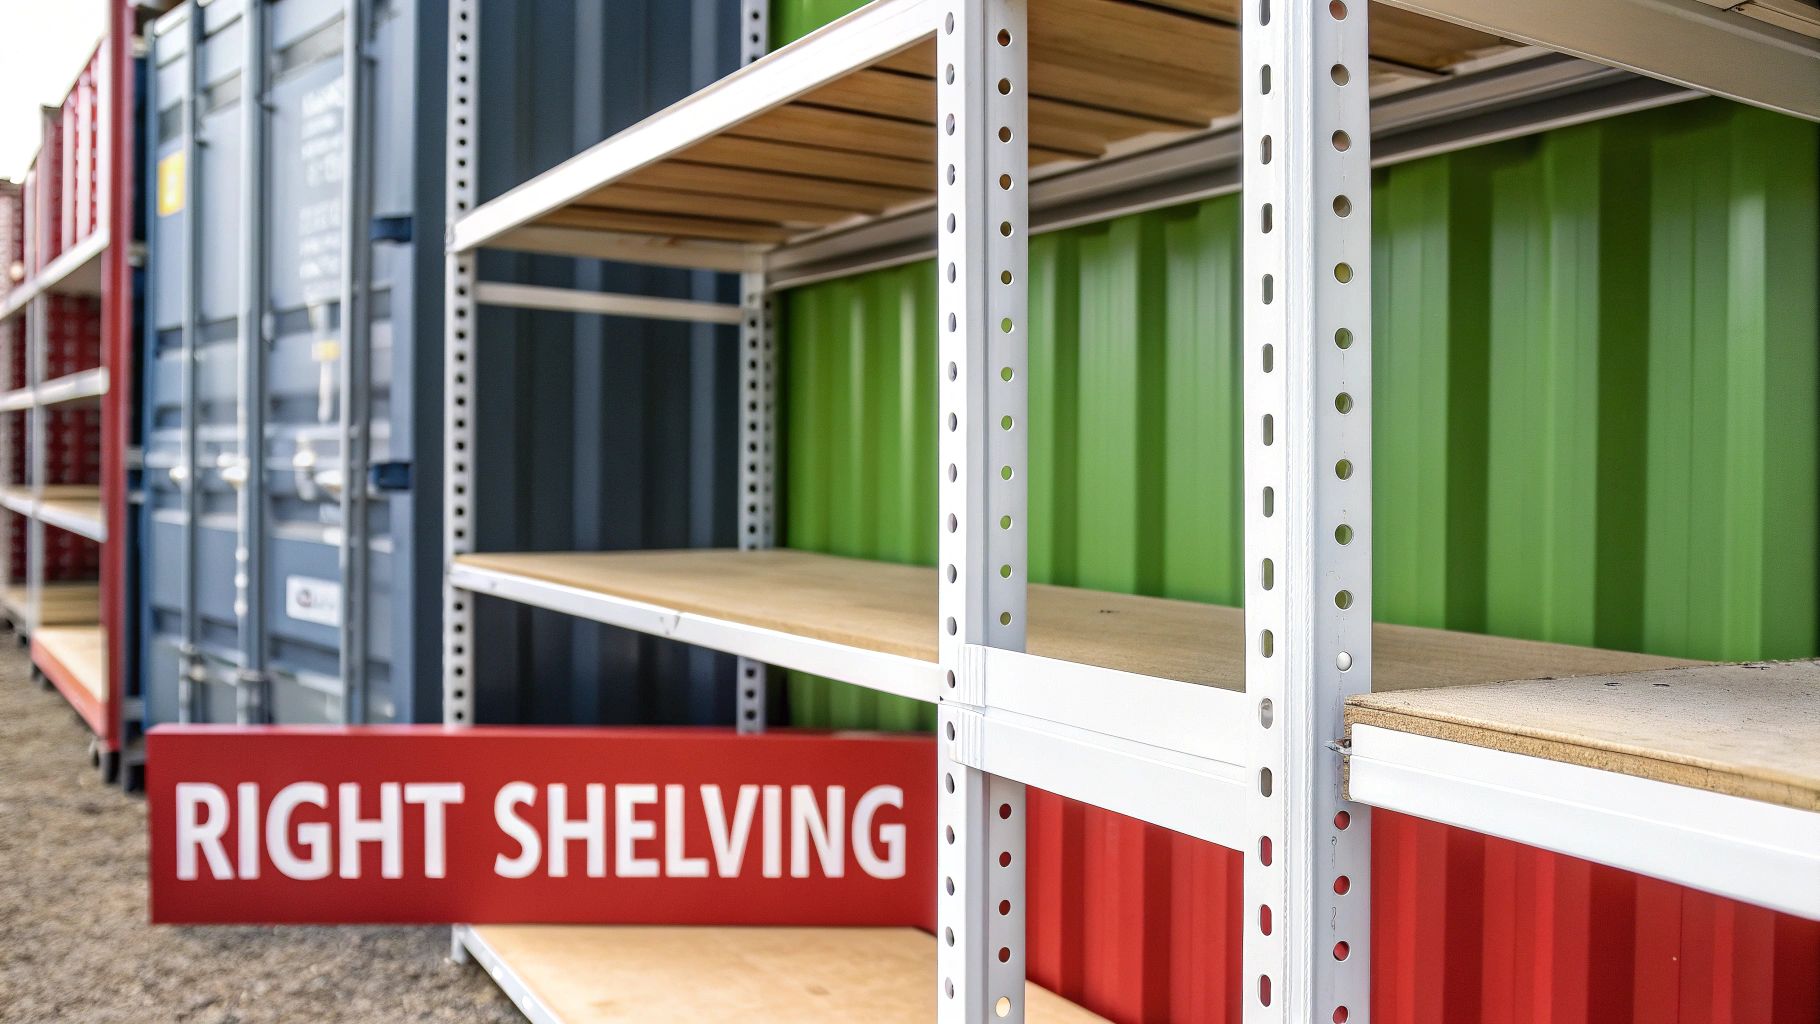
Freestanding vs No-Weld Racking
The two main players in the world of container shelving are freestanding units and no-weld, bolt-in systems. They both have their place, but they serve very different purposes.
Freestanding Steel Shelving:
- Installation: Incredibly straightforward. You just assemble these units inside the container and you’re good to go. No need to fix them to the walls.
- Flexibility: You can shift them around as your needs change or even take them with you if you move the container.
- Best For: Lighter goods, archive boxes, or any situation where you need a quick, temporary organisation fix without any permanent changes.
No-Weld, Bolt-In Steel Racking:
- Installation: These systems are clever. They use specialised brackets that clamp directly onto the container’s lashing points or D-rings. This means no drilling and no welding, which keeps your container's structural integrity and value intact.
- Strength: Because they’re secured directly to the container frame, they offer far superior stability and can handle a much heavier load.
- Best For: Serious, heavy-duty storage. Think engine parts, building materials, or bulky equipment that needs rock-solid support.
For a deeper dive into the nitty-gritty of material grades and designs, this guide to stainless steel shelving units is a fantastic resource for making sure you choose the perfect fit.
Comparing Steel Shelving Types for Shipping Containers
To make the decision a bit easier, here’s a side-by-side look at the most common steel shelving options. This table breaks down the key differences to help you find the best fit for your gear and your budget.
| Shelving Type | Installation Method | Best For | Load Capacity | Pros | Cons |
|---|---|---|---|---|---|
| Freestanding | Assembled on-site, no fixings | Light goods, temporary storage | Low to Medium | Very flexible, easy to install, portable | Less stable, lower weight limit |
| No-Weld Bolt-In | Brackets clamp to lashing points | Heavy-duty industrial storage | High | Very stable, high capacity, no damage to container | Less flexible, more involved installation |
| Galvanised Steel | Any (freestanding or bolt-in) | Damp or outdoor environments | Varies by design | Excellent corrosion resistance, durable | Can be more expensive than standard steel |
| Powder-Coated Steel | Any (freestanding or bolt-in) | General purpose, indoor-like conditions | Varies by design | Good rust protection, variety of colours | Coating can chip if handled roughly |
Ultimately, the right choice comes down to what you’re storing. For lightweight boxes, freestanding is fine. For anything heavy or valuable, a no-weld, bolt-in system is the only way to go.
Material Quality and Finish Matter
Don't be fooled—not all steel shelving is created equal. The gauge of the steel is what determines its strength. A lower gauge number means thicker, stronger steel that can hold more weight without complaining. If you’re storing heavy items, always look for a lower gauge to prevent your shelves from bowing over time.
The finish is absolutely non-negotiable, especially with the UK’s damp climate. Always, always choose shelving that is either powder-coated or galvanised. This protective layer is your only real defence against rust and corrosion, and it will dramatically extend the life of your investment.
Measuring for a Perfect Fit
Before you even think about clicking "buy," get in there with a tape measure. You need accurate measurements of the internal length, width, and height of your container. Just as importantly, measure the actual items you plan to store to work out the ideal shelf depth.
It's a classic mistake to buy shelves that are too deep. It just creates dead, unreachable space at the back. On the flip side, shelves that are too shallow are a complete waste of valuable storage potential.
Plan your layout properly. Make sure you leave a decent aisle space so you can actually move around and get to your things without a struggle. You can find a whole range of container shelving systems designed to fit standard container dimensions perfectly. A bit of careful planning here ensures your new shelving doesn't just fit into the space, but functions perfectly for you.
Preparing Your Container for Installation
A flawless steel shelving setup begins long before you even touch the first bracket. Getting the container prep right is the secret to a stable, secure, and long-lasting storage system. If you rush this part, you're setting yourself up for wobbly shelves, wasted space, and potential damage down the line.
Your first job is a proper deep clean. Shipping containers have been on quite a journey, so take the time to sweep out all the debris and give the interior walls and floor a good wash. This isn't just about tidiness; it's your best chance to get up close and inspect the container's real condition.
Inspect and Address Potential Issues
While you're cleaning, keep a sharp eye out for any rust spots, especially lurking in the corners and along the floor. A bit of surface rust is pretty common, but it needs dealing with straight away. Grab a wire brush to scrub off any loose flakes, then treat the area with a quality rust converter and a coat of metal paint. That'll stop the corrosion in its tracks.
Next up, moisture control. Containers are notorious for condensation, which can wreak havoc on your stored items and the shelving itself. Check that any existing vents are clear and think about adding more if the container will be sealed up for long stretches. Even simple additions like a few moisture-absorbing silica gel packs can make a huge difference.
By far the most critical prep step is making sure the container is perfectly level. An uneven base transfers that instability directly to your shelving, creating a serious safety hazard—especially when you start loading it up with heavy gear.
Levelling a container properly is the foundation for everything else you put inside. For a more detailed walkthrough, it's well worth reading our complete guide on how to level your shipping container before you go any further.
Planning Your Layout
Once your container is clean, dry, and level, it's time to map out your layout. A really simple but effective trick is to use masking tape on the floor to mark out where each shelving unit will stand. This gives you a clear visual of your aisle space and helps you make sure you can actually move around comfortably. This little bit of foresight prevents the all-too-common mistake of ending up with a cramped, unusable space.
This level of detailed prep is more important than ever as businesses increasingly turn to containers for storage. In the UK, warehousing capacity has shot up by 61% since 2015, yet demand is still outstripping supply, pushing industrial unit rents to £14.80 per square foot. In this high-pressure market, savvy operators are using containers for quick-deploy shelving solutions, bypassing the long waits for traditional leases. You can find more insights into how containers are becoming essential to UK warehouse operations on build-review.com. With a well-prepared container, you're all set for an efficient and painless installation.
Installing Your Shelving without Drilling or Welding
Right, let’s get to the hands-on part—getting your new steel shipping container shelving fitted safely and securely. The best part about modern systems is that they’re completely non-destructive. You won’t have to drill a single hole or strike a welding arc, which is brilliant for protecting your container’s value and keeping it watertight.
The two most popular ways to get this done are with no-weld brackets or freestanding units. Both are pretty straightforward, but as with anything, the devil’s in the detail. Before you even think about starting, grab your essential tools. A socket set, a spirit level, and a tape measure will be your best mates for this job.
Mastering No-Weld Bracket Installation
No-weld brackets are an absolute game-changer for heavy-duty storage. They’re cleverly designed to lock straight onto the container’s built-in lashing points or D-rings—those solid steel loops you see along the top and bottom of the interior walls. This genius method transfers all the weight of your shelves directly to the container's structural frame.
First up, find the D-rings you want to use. Most containers have them spaced about four feet apart. Just hook the curved ends of the brackets onto the D-rings. The 'T' section at the bottom of the bracket should then sit flush against the corrugated container wall, giving you a really stable, vertical support.
Once your brackets are firmly in place, you can lay your timber or steel shelf boards across them. If you're after a reliable setup, checking out something like these fast-install 1-tier shipping container shelving brackets is a great place to start for a robust, no-fuss system.
Assembling and Securing Freestanding Units
If your storage needs are a bit lighter or you think they might change down the line, freestanding shelving offers fantastic flexibility. Putting them together is usually simple, a lot like assembling standard garage shelving. The real trick here is making sure they’re stable once they’re built.
Even though they don't attach to the walls, you absolutely must stop them from tipping over, especially if you’re storing anything heavy or valuable. If the unit has pre-drilled holes in its feet, you can bolt it straight to the container's wooden floor for that extra bit of security. For a less permanent fix, use heavy-duty zip ties or metal straps to connect adjoining units, creating a single, more stable block.
Crucial Safety Advice: Always load your shelves from the bottom up. Sticking your heaviest items on the lowest shelves creates a low centre of gravity, which massively reduces the risk of the whole thing becoming top-heavy and toppling over. Never, ever exceed the manufacturer’s stated weight capacity for each shelf.
Before you jump into the installation, this simple flow shows the non-negotiable prep work for a successful setup.
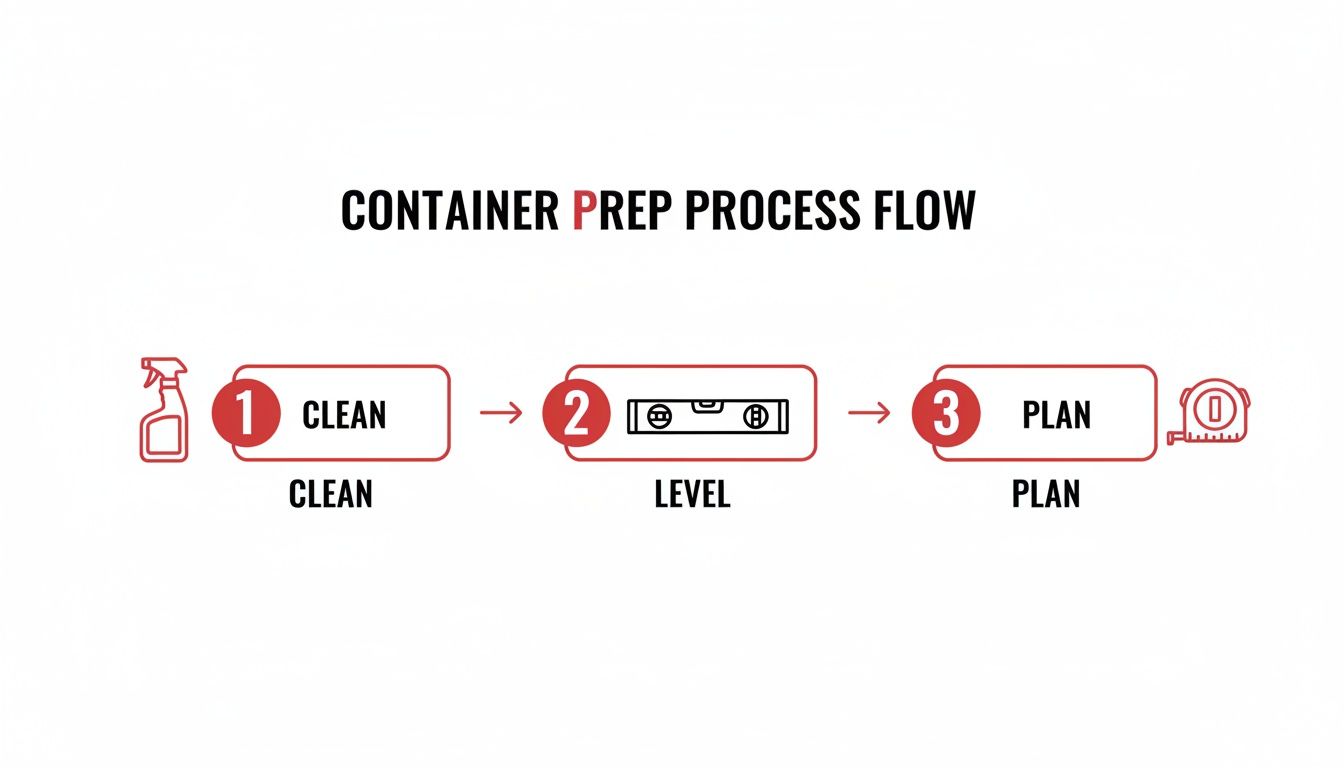
This just hammers home the point that cleaning, levelling, and planning aren't just suggestions—they are the foundation for a safe and solid installation.
Final Checks for a Rock-Solid Setup
Before you start piling things onto your new shelves, take a few minutes to do some final checks. It’s a small investment of time that can save you from a major headache later on.
- The Wobble Test: Give each bracket and freestanding unit a firm shake. There should be very little movement. If you notice a serious wobble, go back and double-check all your connections. Make sure everything is properly tightened.
- Level Check: Get your spirit level out and place it on each shelf. If a shelf isn’t level, things can slide around and put uneven stress on the supports. Adjust the brackets or the feet on your freestanding unit until every shelf is perfectly horizontal.
- Inspect Clearances: Take a final look to ensure there are no big gaps between the shelves and the container walls where items could fall. Also, make sure your aisle is still wide enough for you to move around and get to your stuff comfortably.
By sticking to these non-destructive installation methods, you keep your shipping container’s structural integrity intact while creating a seriously functional and organised storage space. Remember, a well-installed system is a safe system.
Layout Organisation and Long-Term Maintenance
With your steel shelving securely installed, your focus can shift from construction to smart organisation and diligent upkeep. Getting this part right is what transforms a simple storage space into a genuinely productive asset, and a simple maintenance routine will protect your investment for years to come.
Thinking strategically about where things go is the cornerstone of an efficient system. It’s mostly common sense: the items you grab most frequently should be stored near the container doors for quick and easy access. This simple habit saves countless minutes that would otherwise be spent digging through aisles.
For some great ideas on how to create a productive workspace, exploring some actionable workshop organization ideas can provide valuable insights for optimising your new shelving layout. A bit of planning now prevents your container from slowly devolving into a disorganised mess down the line.
Practical Layout Strategies
A logical layout isn't just about convenience; it's about safety and stability. The most fundamental rule is to place your heaviest goods—like engine parts, hefty toolboxes, or full paint tins—on the bottom shelves. This creates a low centre of gravity, making the entire structure far more stable and significantly reducing any risk of tipping.
Consider these practical tips for getting your shelves organised:
- Group by Function: Store similar items together. All your plumbing fittings go in one area, and electrical supplies in another. It’s a simple way to create a predictable, easy-to-navigate system.
- Use Clear Bins: For all those smaller, loose items, transparent plastic bins are a lifesaver. You can see the contents at a glance without having to pull down every single box.
- Label Everything: It might feel tedious at first, but labelling shelves and bins is a huge time-saver in the long run. A cheap label maker makes this a quick and painless task.
Remember, the goal of organisation is to minimise the time it takes to find and retrieve what you need. A few hours spent setting up a logical system now will pay dividends every single time you use the container.
Simple Long-Term Maintenance Routines
Maintaining your steel shipping container shelving is straightforward, but it’s absolutely essential for ensuring its longevity, especially given the UK’s damp climate. A little bit of proactive care goes a long way in preventing common issues like rust and structural fatigue.
Your maintenance checklist should be simple and something you can run through every few months. Start with a quick visual inspection of all the brackets and supports. Look for any signs of bending, stress, or connections that might have loosened over time, and give them a tighten where necessary.
Next, give everything a once-over for corrosion. Even with a tough powder-coated finish, knocks and scratches can expose the bare metal to moisture, giving rust a place to start. If you find any chips or scrapes, just clean the area thoroughly and touch it up with a suitable metal paint to reseal the surface.
Finally, give the shelves a quick wipe-down to remove dust and dirt. A clean environment is far less likely to hold moisture, which helps protect both your shelving and your stored goods. And always, always respect the stated weight limits to prevent long-term bowing and ensure lasting safety and durability.
Frequently Asked Questions
Even with a solid plan, a few questions always seem to pop up when you're tackling a new project. Let's run through some of the most common queries we get about fitting out a container with steel shipping container shelving.
Getting these details sorted from the start helps you sidestep common mistakes and achieve a professional, long-lasting result.
Do I Need to Drill Into My Container to Install Steel Shelving?
Absolutely not, and you really shouldn't. The best modern steel shelving systems are designed to be completely non-destructive, which is crucial for preserving your container's value and integrity.
Clever no-weld brackets are the most popular solution by far. They're engineered to clamp securely onto the container's existing internal lashing points or D-rings. This method is brilliant because it protects the structural strength and, most importantly, the watertight seal of your unit. Freestanding shelving is another excellent drill-free option for lighter loads.
What Is the Typical Weight Capacity for Container Shelving?
This varies hugely depending on the system you choose, so it's vital to match the capacity to what you actually plan to store.
- Heavy-Duty Bolt-In Racking: These systems are the real workhorses. They can often hold several hundred kilograms per shelf, making them ideal for bulky items like heavy tools, machinery, or engine parts.
- Lighter-Duty Bracket Systems: These typically support between 100kg and 250kg per shelf level. They're perfect for general storage, archive boxes, and lighter equipment.
- Freestanding Units: These usually have the lowest capacity and are best suited for lighter goods where you need a bit more flexibility.
Always check the manufacturer's stated capacity before you buy. A critical safety rule is to distribute weight evenly and place the heaviest items on the bottom shelves. This keeps the centre of gravity low and stops any chance of tipping.
How Do I Stop My Steel Shelving from Rusting Inside the Container?
Rust prevention is a massive priority, especially with the notoriously damp UK climate. The most effective way to keep corrosion at bay is to tackle it from a few different angles.
First, always choose shelving that comes with a protective finish. A powder coating or galvanisation provides a robust barrier against moisture right out of the box.
Second, you have to actively manage condensation inside the container itself. You can improve airflow by installing air vents, and it's well worth considering moisture absorbers or even a small dehumidifier, especially during the colder months.
Finally, make a habit of inspecting your shelves regularly. If you spot any deep scratches or chips in the coating, touch them up with a suitable metal paint immediately. This simple action stops rust before it has a chance to take hold and spread.
Ready to transform your shipping container into a model of organisation? Quickfit Container Accessories offers a comprehensive range of no-weld shelving brackets and accessories designed for durability and easy installation. Explore our solutions and get your project started today at https://www.quickfitcontaineraccessories.co.uk.